Much like Google Ads, Microsoft (Bing) Ads also require the installation of a tracking code on your website. Not only does appropriate tracking allow you to receive beneficial insights into user behavior, it also allows your Bing Ads account to best optimize for the goals that are most important to your business, such as purchases, lead form submissions, phone calls, and more. In this blog, we’re going to outline the steps taken when learning how to set up Bing conversion tracking.
Setting Up Bing Conversion Tracking: Step-by-Step
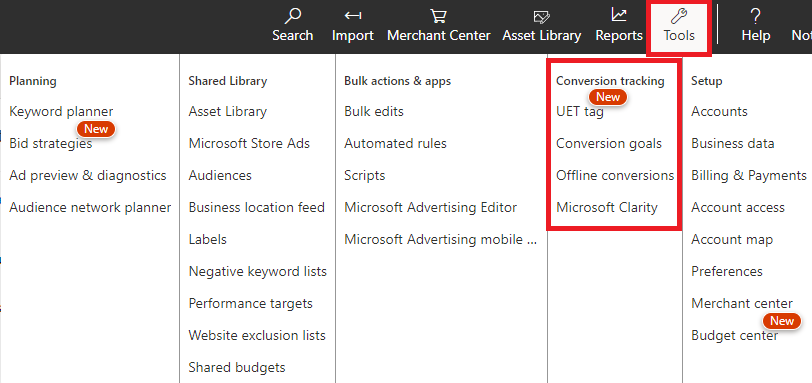
The first step to setting up Bing conversion tracking will be installing the UET, or Universal Event Tracking, tag. To create a UET tag for your account, click the Tools dropdown from the top right of your Microsoft Ads account, then click UET tag under Conversion tracking.
Related Blog: How to Set Up & Configure Basic Conversion Events for Your Website in Google Analytics 4 (GA4)
Related Blog: How to Install a Facebook/Meta Pixel on a WordPress Site
On the next screen, click the blue Create button near the top left.
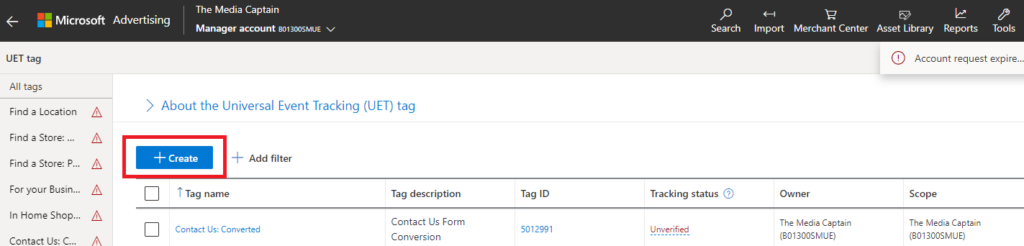
Creating a New UET Tag
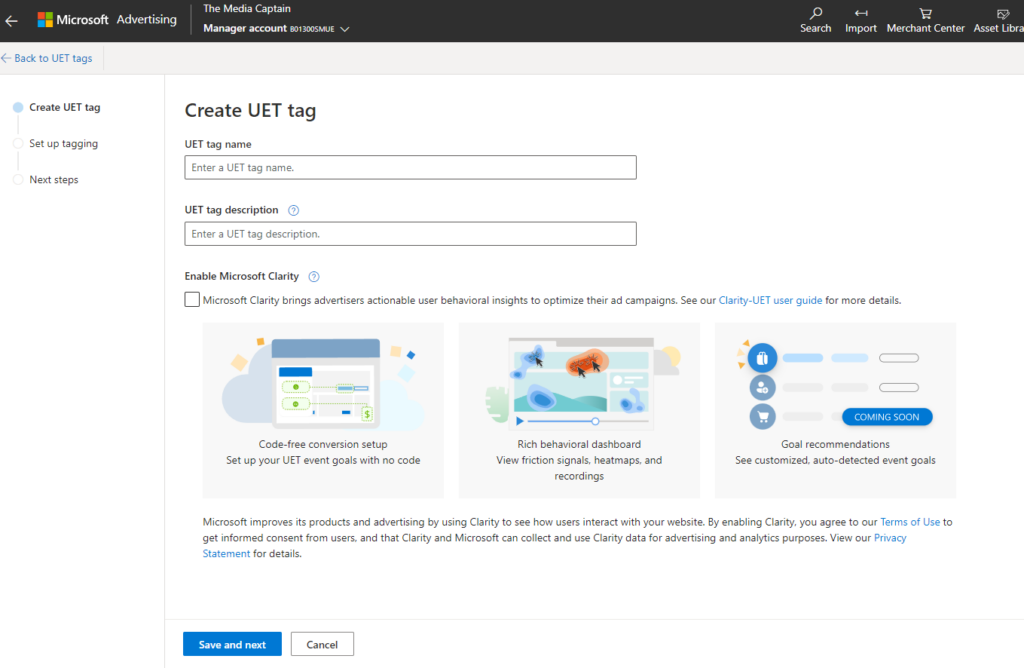
On the “Create a UET tag” screen, enter a UET tag name, a description, and check whether or not you want to enable Microsoft Clarity. There are three main benefits that Microsoft Clarity offers:
- Code-free conversion tracking
- A robust user behavior dashboard
- Goal recommendations
Read Microsoft’s Clarity-UET user guide for more details.
If you value simplicity, utilizing Microsoft Clarity is the route to go because no extra code is needed to set up conversion tracking. For the sake of this guide, we’re going to enable Microsoft Clarity. After you’ve entered all of the details, click the blue Save and next button.
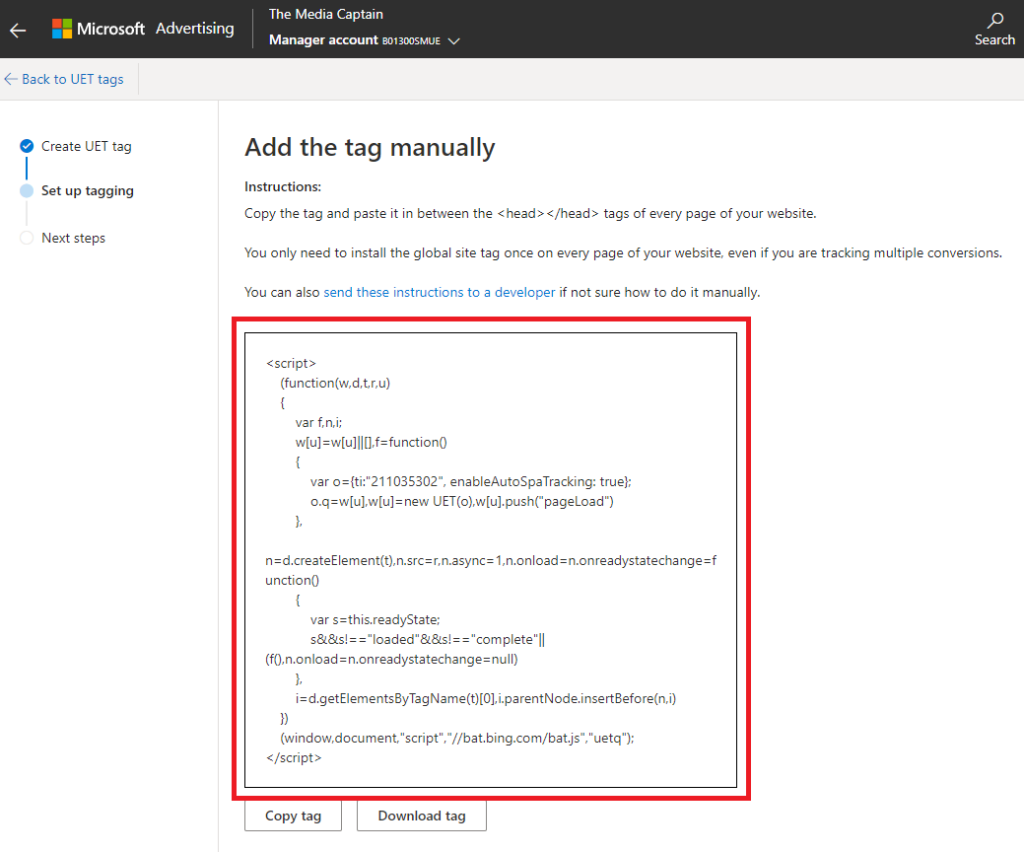
Installing the UET Tracking Code
On the “Set up tagging” screen, you’re given four options for UET tag installation. We’ll explore each so that you can choose the best (or easiest) option for you.
- Install the tag yourself
- Send the tag to a developer
- Add the tag through a website editing platform
- Automatically add the tracking tag through Google Tag Manager

Installing the Tag Yourself
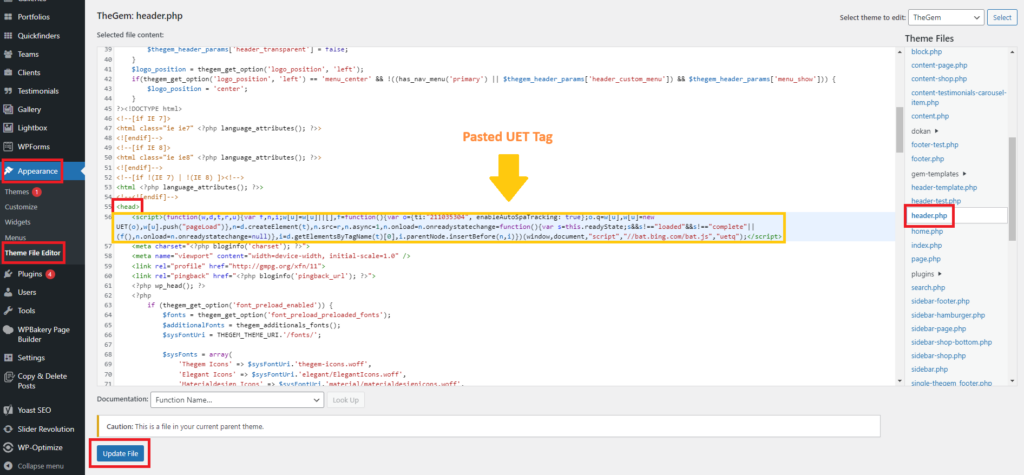
If you have experience working with code, you can install the tag yourself. After clicking the appropriate box, you’ll land on the “Add the tag manually” screen. Copy or download the code displayed here.
Next, head to your website’s file manager and find the header.php file. In this example, we’re going to use WordPress, where you can access your theme’s files through the backend of your website.
- Login in to your WordPress website.
- From your WordPress dashboard, go to Appearance then Theme File Editor from the left side menu.
- From the right side of the Theme Files page, find and select the header.php file.
- Scroll through the code and find the opening <head> tag. Paste the copied code directly underneath.
- Click Update file.
Back in Microsoft Ads, click Next and you’re done.
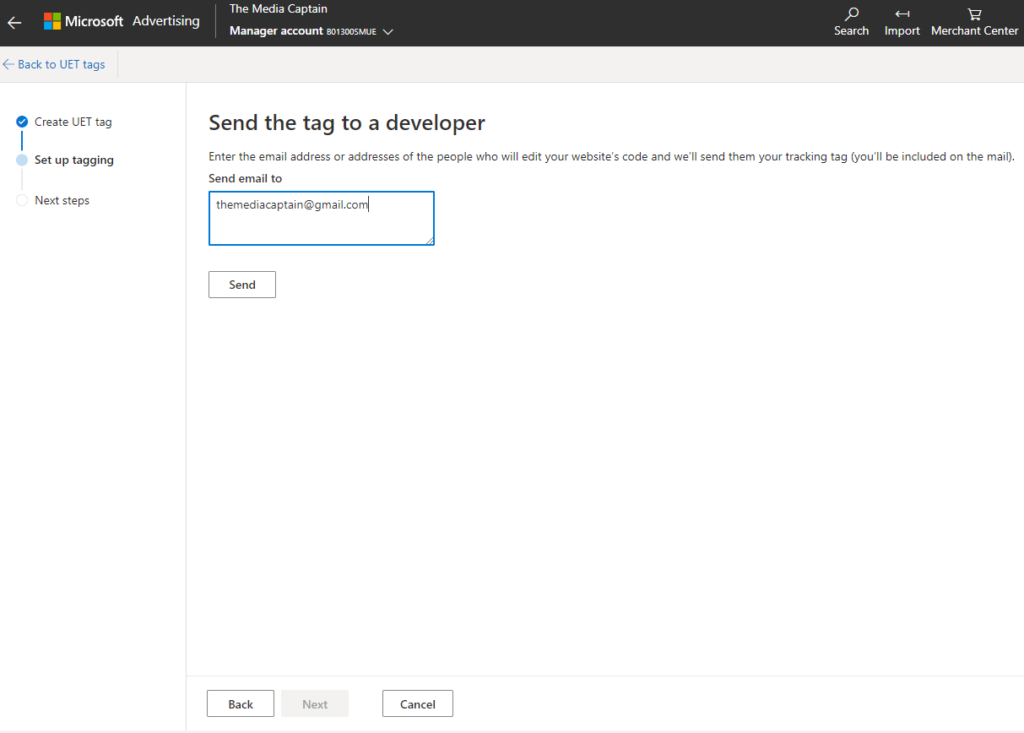
Sending the Tag to a Developer
Opting to send the tag straight to a developer is arguably the easiest way to install it. Just make someone else do it! Click the appropriate box, and on the next screen, enter the email(s) of the intended recipient(s). If sending to more than one person, enter one email address per line. Click Send. That’s it! Now sit back and let the developer work their magic.
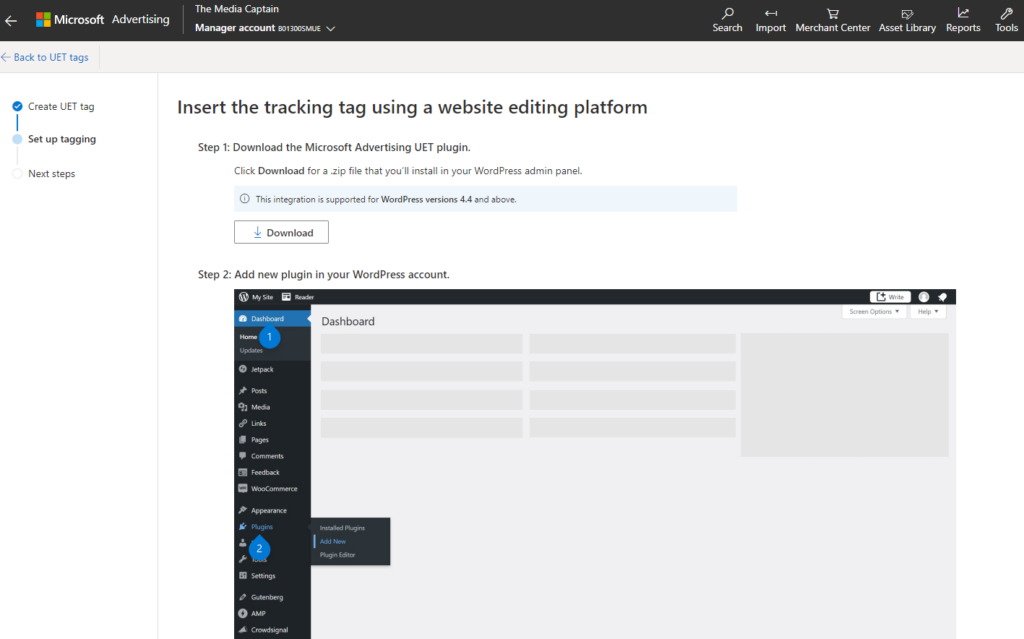
Adding the Tag Through a Website Editing Platform
If you use WordPress, Wix, Shopify, BigCommerce, WooCommerce, or SquareSpace, Microsoft details the steps needed to install the tag on each platform. For WordPress, this would require the installation of the Microsoft Advertising UET plugin. No matter which platform you use, Microsoft provides straightforward instructions on how to add the tag to each.
Once you’ve gone through the steps dependent on the platform, click Next back in Microsoft Ads and you’re done!
Automatically Installing the Tag via Google Tag Manager
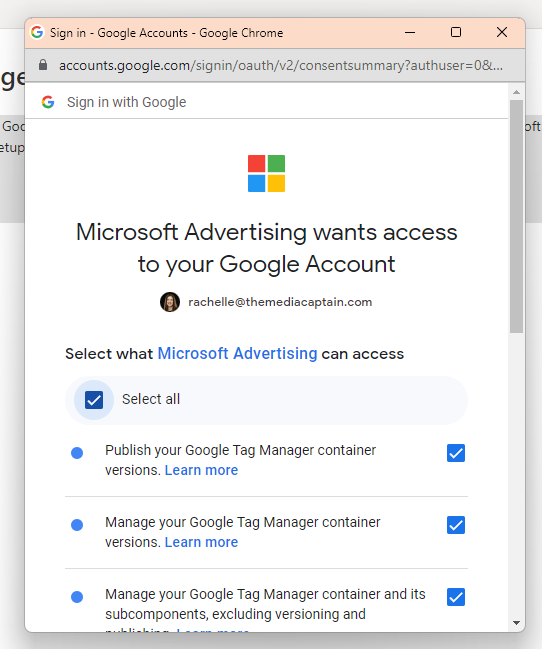
If you’ve clicked this box, you’ll be prompted to Connect Your Google Tag Manager account on the next screen. From here, you’ll click the blue Sign in with Google button.
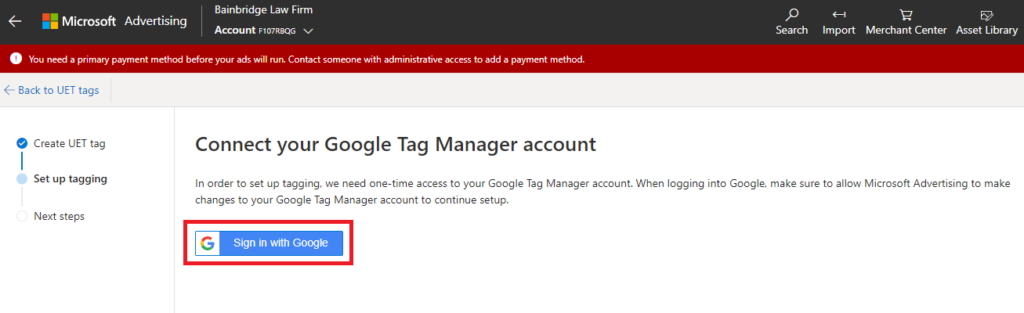
Once clicked, sign in with the same Google account that you use to sign into Google Tag Manager. When prompted to select what Microsoft Advertising can access, click Select all. Scroll down and click Continue.
Back in Bing Ads, select the appropriate Google Tag Manager account and container from the dropdowns. Click Next.
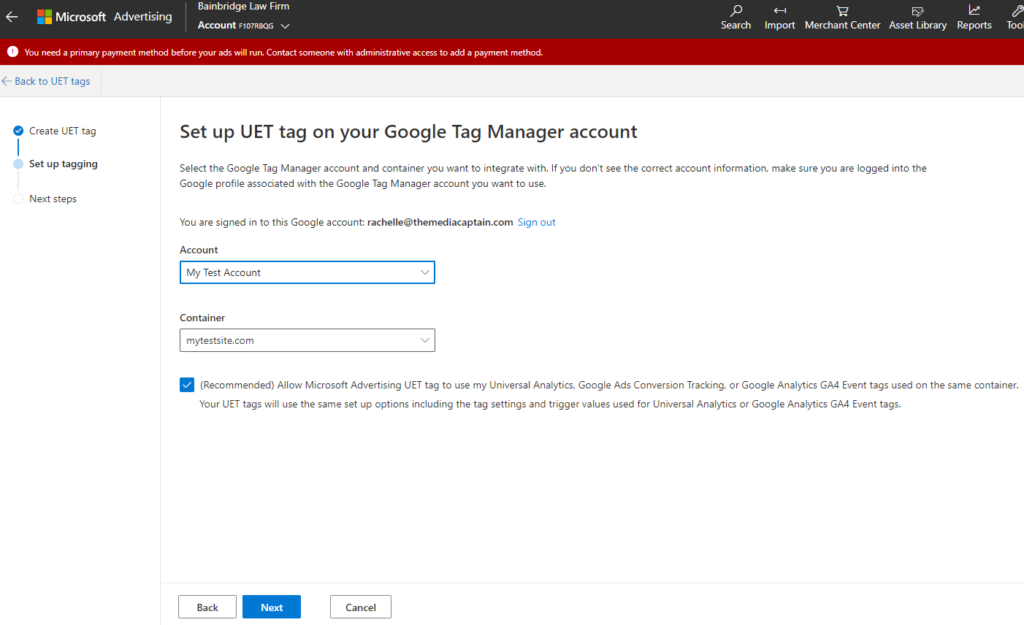
And you’re done!
How to Set Up Bing Conversion Tracking: Conclusion
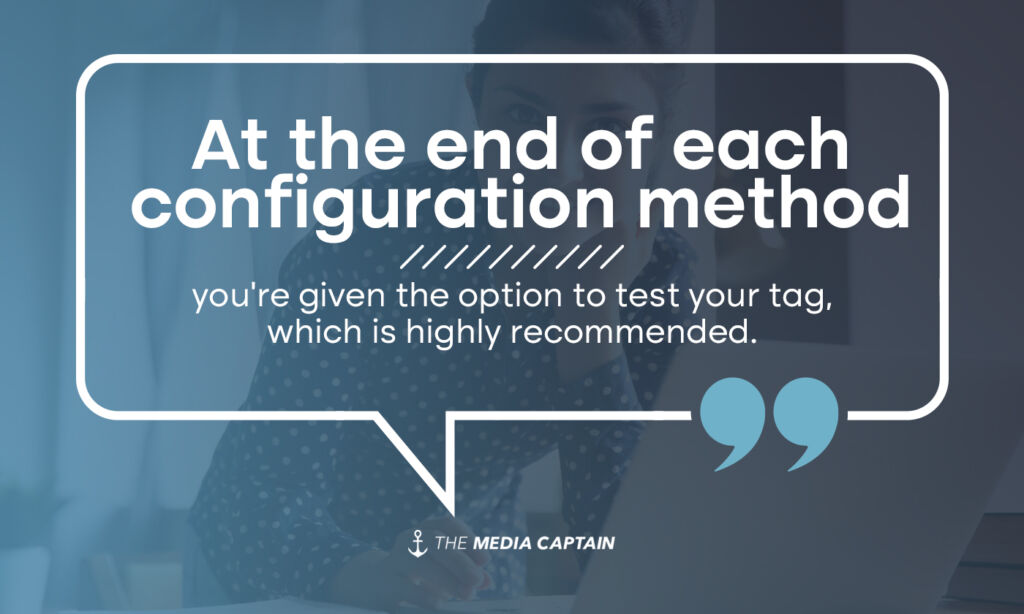
At the end of each configuration method, you’re given the option to test your tag, which is highly recommended. Keep in mind that it can take around 24 hours for Microsoft to detect your tag installation. If for some reason your tag isn’t pulling data after 24 hours, you’ll have to go back through the steps to ensure it was installed correctly.
If you’ve gone through the all steps of how to set up Bing conversion tracking but are still having trouble, reach out to us here at The Media Captain where we’d be happy to help.