
Instant Mobile Experience Ads on Meta allow you to showcase numerous features of your business in a compelling manner.
When you think of a hotel, one image isn’t going to convey all of their beautiful amenities. They want to showcase their rooms, pool, lobby and other amenities. An Instant Mobile Experience Ad allows for you to do this.
I love Instant Mobile Experience Ads because it’s visually compelling and the layout allows for you potential customers to visually see many great features of your business. IMEA (Instant Mobile Experience Ads includes a combination of media, such as videos, photos and products.
Like the name suggests, Instant Mobile Experience Ads only serve on mobile devices. According to Facebook, “Instant Experiences are designed to capture the complete attention of your audience. Within an Instant Experience, people can watch engaging videos and photos, swipe through carousels, tilt to the pan, and explore lifestyle images with tagged products—all in a single ad.” This ad type highlights a business’s brand, products, or services. When used properly, it can improve a brand’s ad quality and capture leads more effectively than traditional Meta-ad types.
You can see for yourself what an Instant Experince advertisement looks like [Watch YouTube Video].
I also included a screenshot below of three of my favorite Instant Mobile Experience Ads for our clients so you can get a better visual of what this has the potential to look like.
We will walk you through how to set up an Instant Experience ad on Facebook from start to finish. If you need help with your Facebook advertising, contact The Media Captain. If you already know how to set-up a basic campaign, skip to step seven.
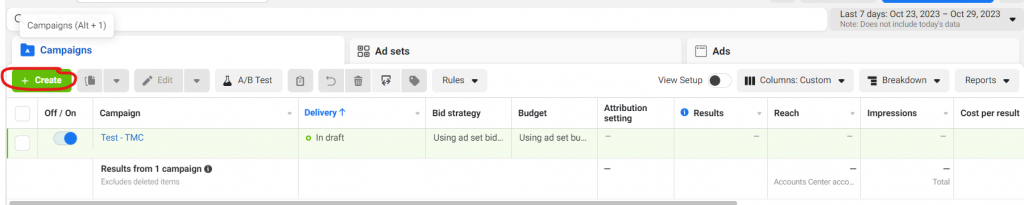
Step One: Create Campaign
When you’re logged into your Facebook business manager account, click the green Create button in the left hand corner.
First, you’ll need to login into your Facebook ads manager. If you don’t have a Facebook ads manager, following these steps from Facebook to set one up: “Getting Started” on ads manager.
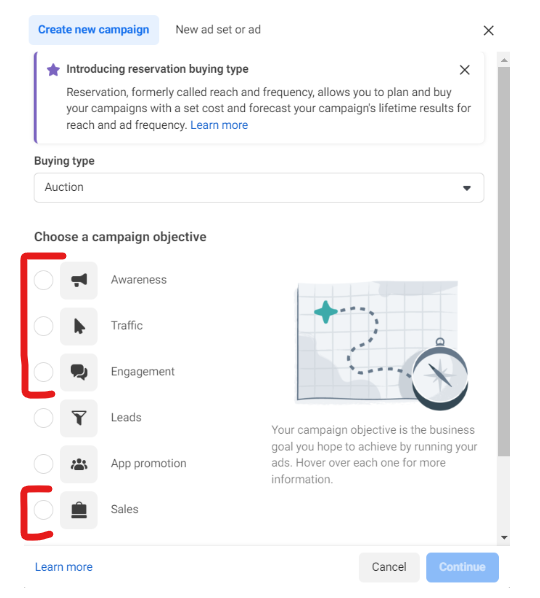
Step Two: Select a Campaign Objective
Once you click on “Create” a new campaign, you’ll be asked to choose the campaign objective. You can choose any of the objectives listed below:
- Awareness
- Traffic
- Engagement
- Sales
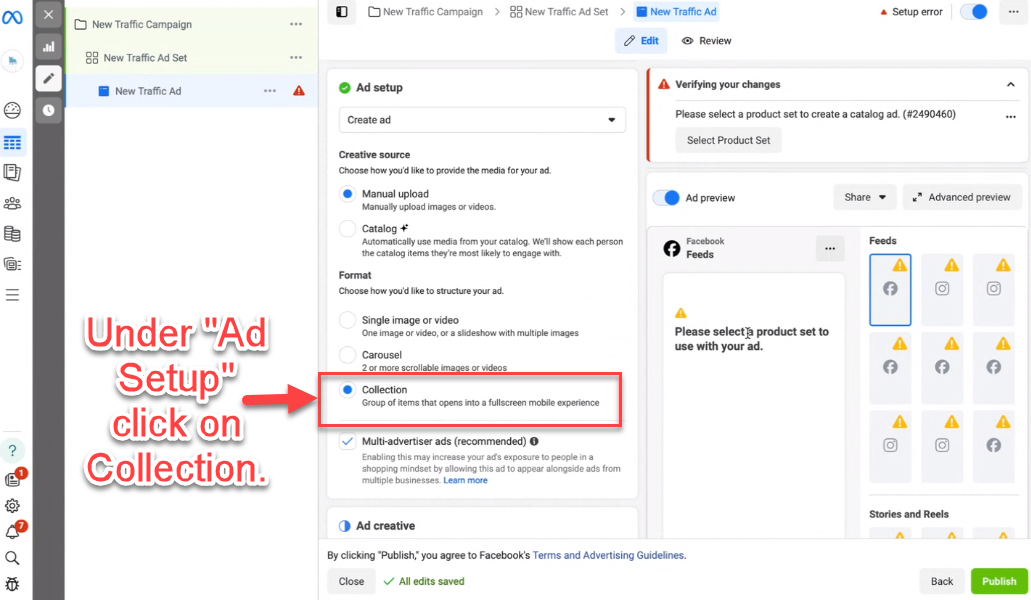
Step Three: Select Ad Group Level
The next step will look like you’re setting up any standard Facebook ad campaign. Where you’ll find the mobile experience ads is within the ad group level (screenshot below).
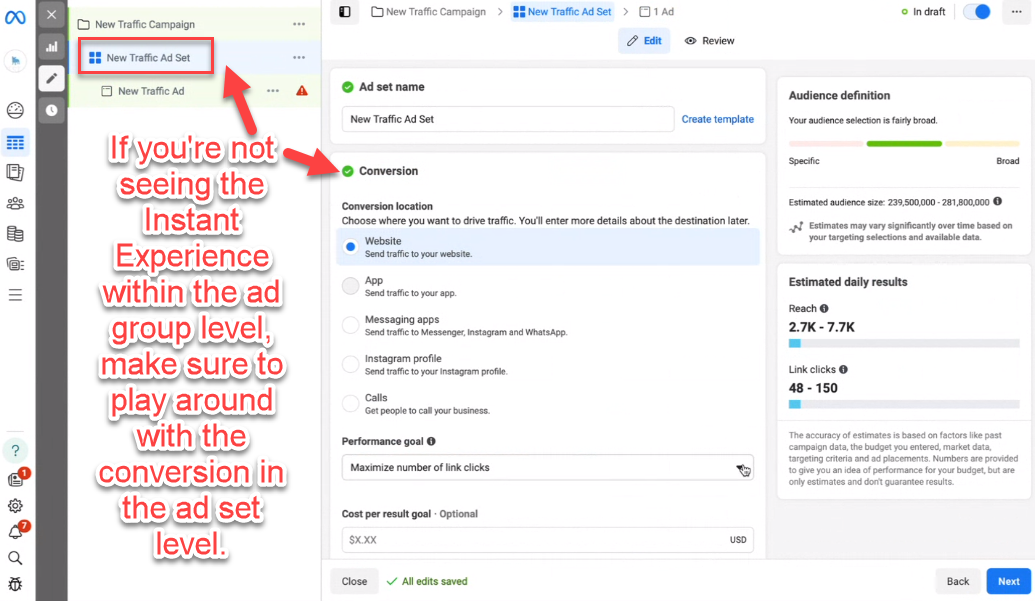
Important Note: Facebook often times defaults to messaging apps under conversion. A messaging conversion will not trigger the Instant Experience Ad. We recommend

Once you’re in the ad group level, scroll down until you see the ad setup section and click on “Collection.”
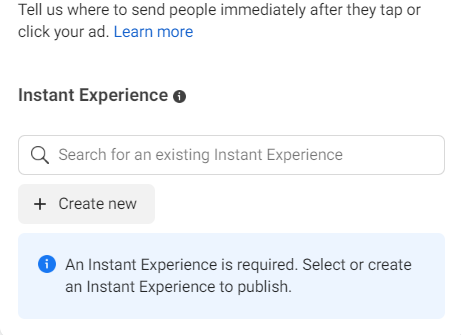
From there, continue scrolling to the section called “Destination.” This is where you’ll set up your Instant Experience.

Important Note: If you’re not seeing Instant Mobile Experience with the ad set level, check your conversions within the ad set level. For example, a messaging conversion for a traffic ad will not trigger the Instant Experience Ad.
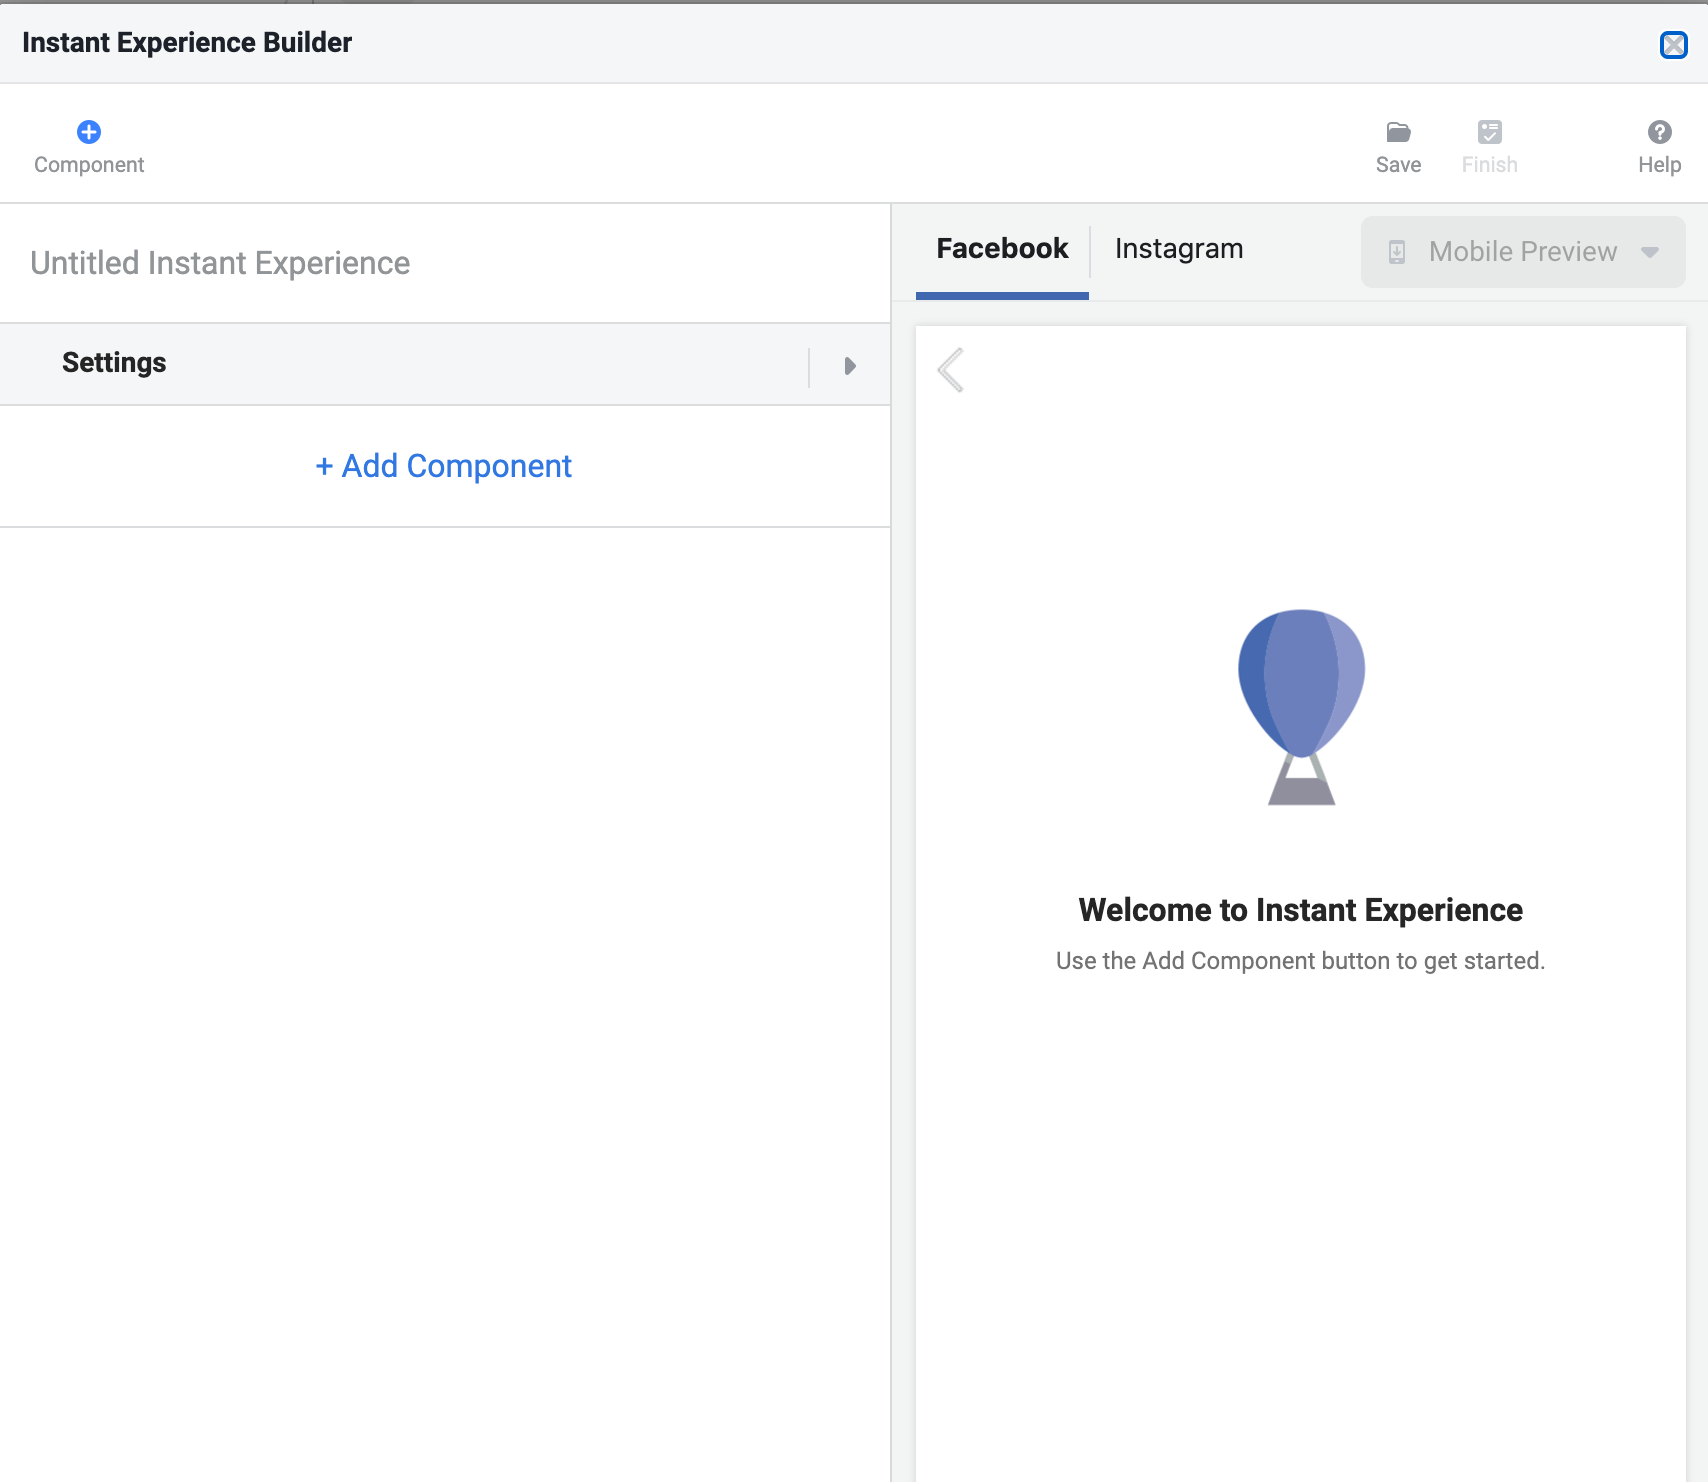
Step Four: Building the Instant Experience
Creating New Instant Experience
The next step is to create the instant experience. In the middle of ad setup you’ll be prompted given the option to create a destination – click “create new”.
Choosing a Template
A pop up of default templates will be presented. Choose the one that best alings with your business objectives. I did a detailed breakdown of each template to help you make a more informed decision.
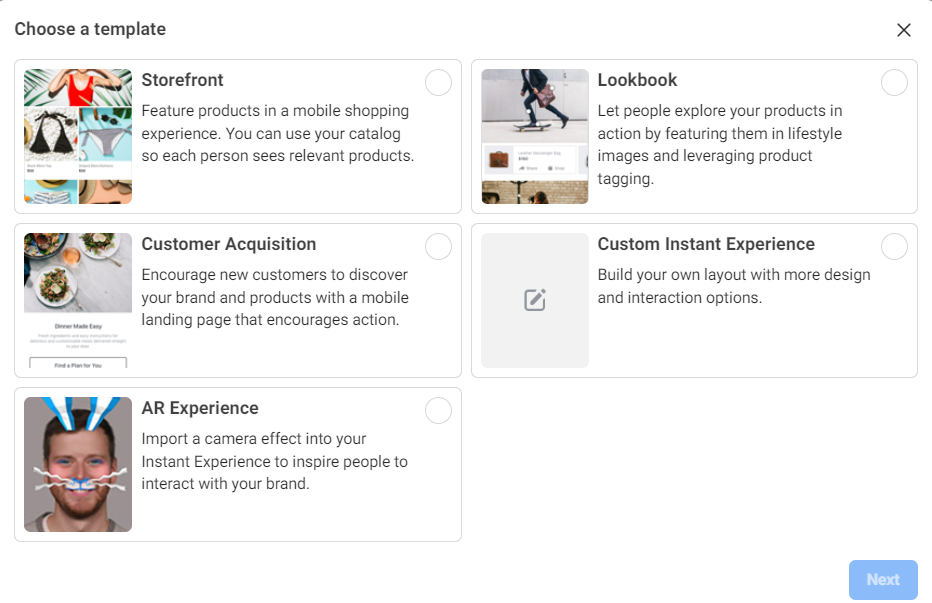
The standard templates are wonderful and easy to use. As to which is ideal for you, it’ll depend on your objectives. There aren’t definitive rules on what format should be used in every situation. An online business selling products and is direct to consumers may find the storefront or lookbook the best approach. A service based business may need to educate them more therefore need to use the customer acquisition template or create a custom instant experience altogether.
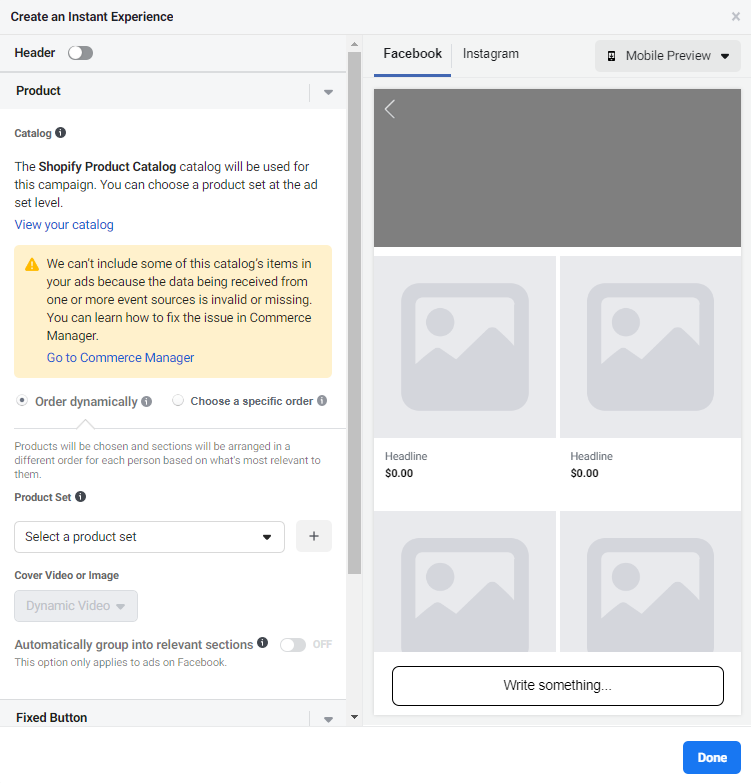
Storefront
Storefront showcases products in a grid layout for customers to see your product offerings in one place. When creating a storefront choose a high quality hero image as the primary creative.
Next, select a product set that’s either dynamically ordered or predetermined. Either way, select products with high quality image renders. You can do this by manually selecting the order products appear in or creating a new product set with the featured items.
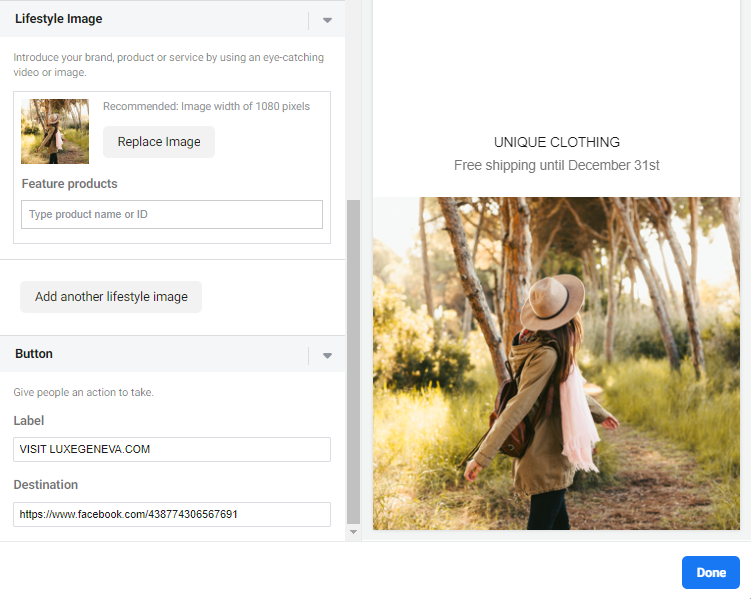
Lookbook
The lookbook showcases products through lifestyle images. This works great when the products a business offers are best paired with inspiration. For example, a clothing brand may want to show audiences a wide range of products through various images to encourage their potential customers to buy their clothes in sets versus one off items. It’s important that the main creative is high quality and eye-catching. The supplemental verbiage should include a promotion or hard hitting copy that will motivate the viewer to make a purchase or at minimum navigate to the main website.

Like the storefront template, you’ll need to connect your Meta Business Suite Commerce catalog to this template. Each lifestyle image can be tagged with the products featured in the image. Under the lifestyle image you’re able to search the product associated with the image provided your commerce manager is linked to your ads account.
Customer Acquisition
The customer acquisition option allows you to to create your own instant experience from scratch. I do not recommend this for beginners, the other templates will help guide you through a good set up from a user experience perspective.
Step Five: Creating The Ad. A Real Life Example.
We’re going to use an example of a boutique hotel that’s a client of ours. We chose the “Customer Acquisition” template and followed the steps.
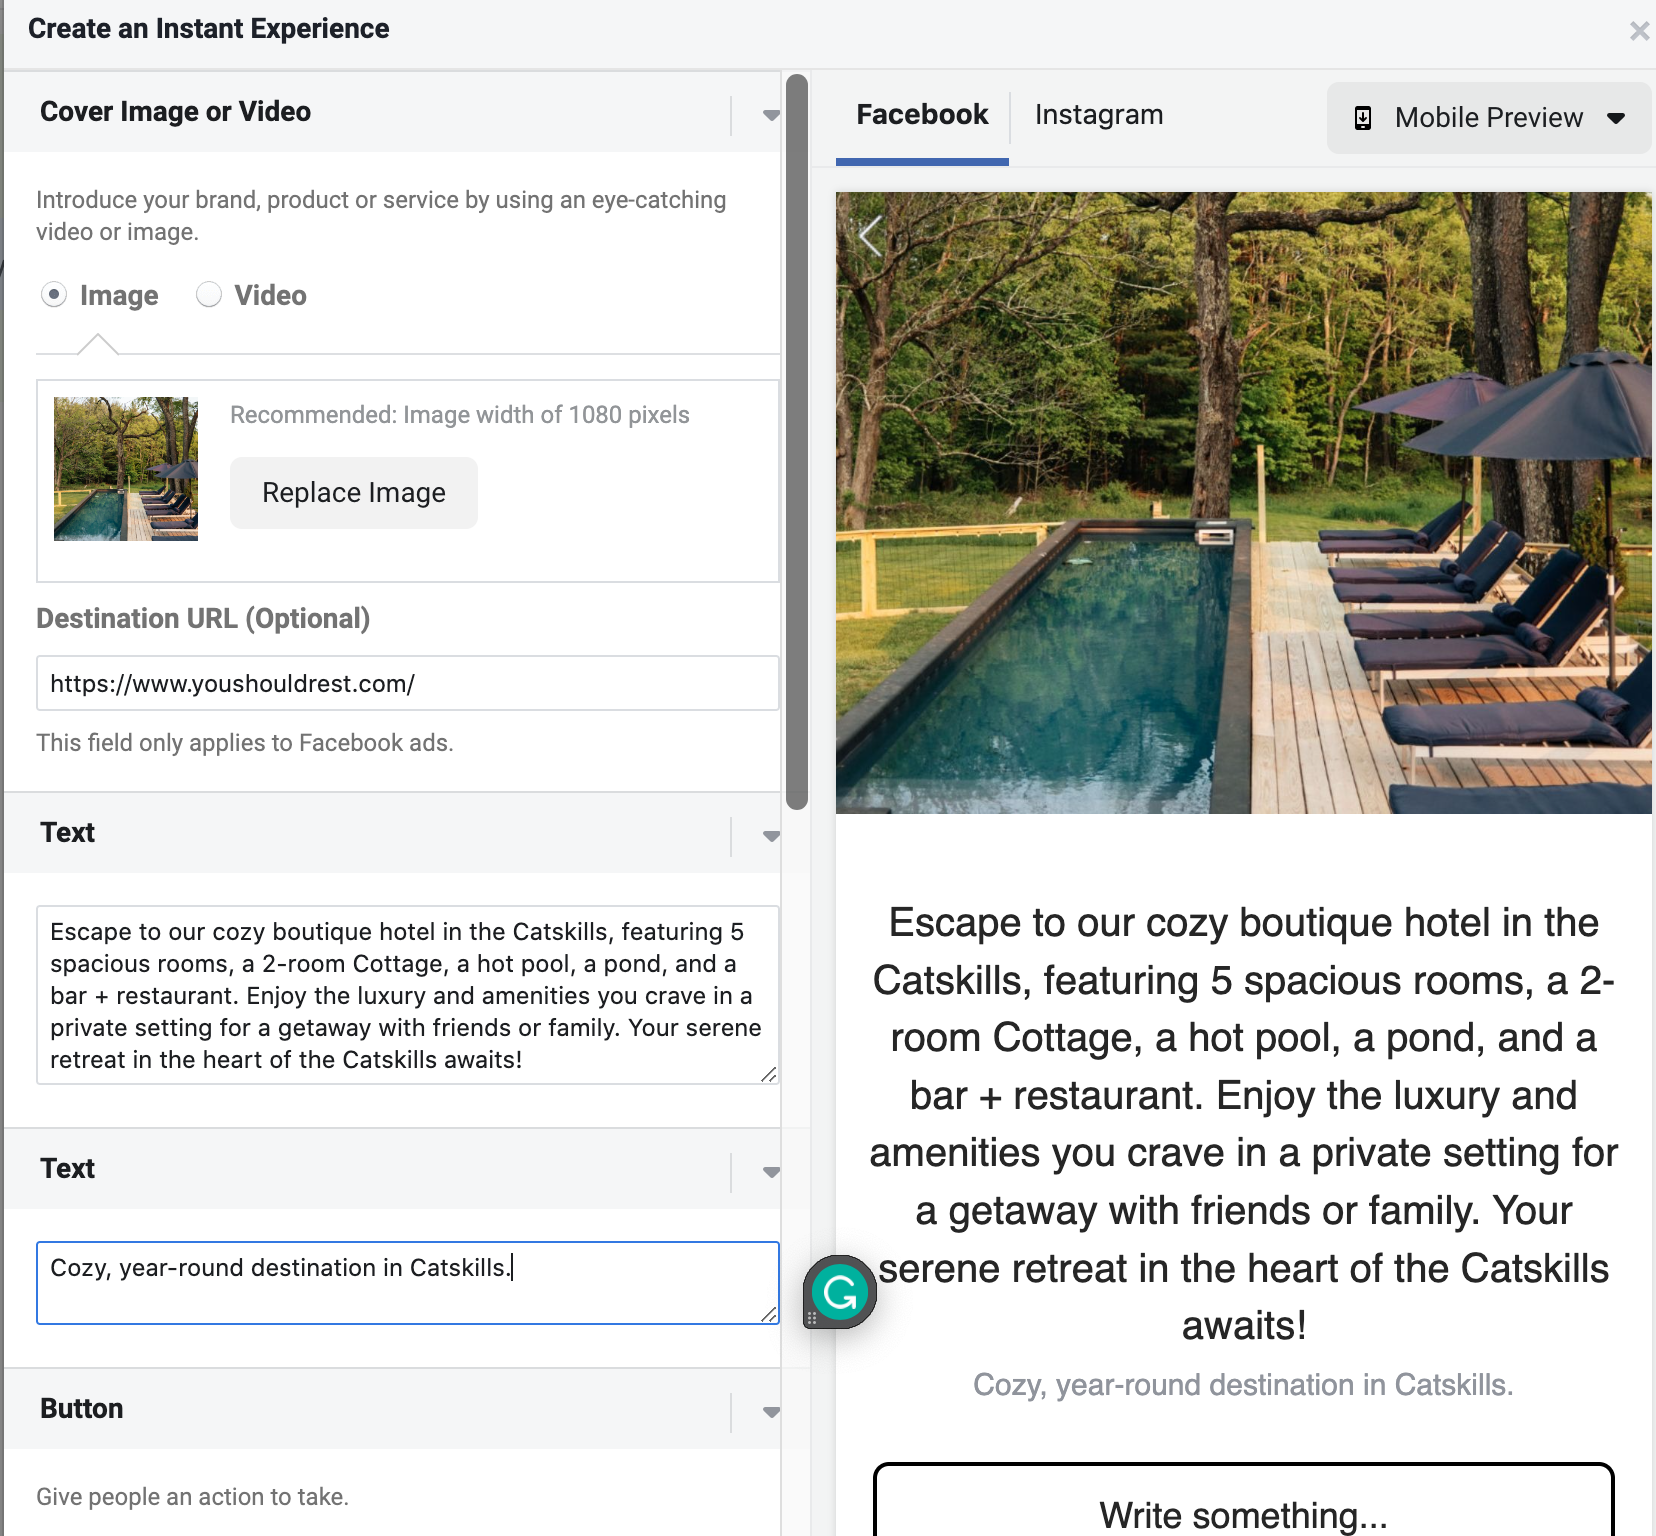
Primary Image
First, I added a primary image (you could also choose a video). The primary image should be your most memorable picture as it’s going to be larger than the carousel images.
You will need to include the destination URL and verbiage. In our example, we wrote about all o the great amenities of this hotel.
Carousel:
As you scroll down within the ad builder, you will choose additional supporting images and verbiage for the ad. When you think of a hotel, you want to highlight all of the features such as the lobby, the rooms, a restaurant, the grounds, pool, etc. You will need to select at least 4 supporting photos and you can add more if needed.
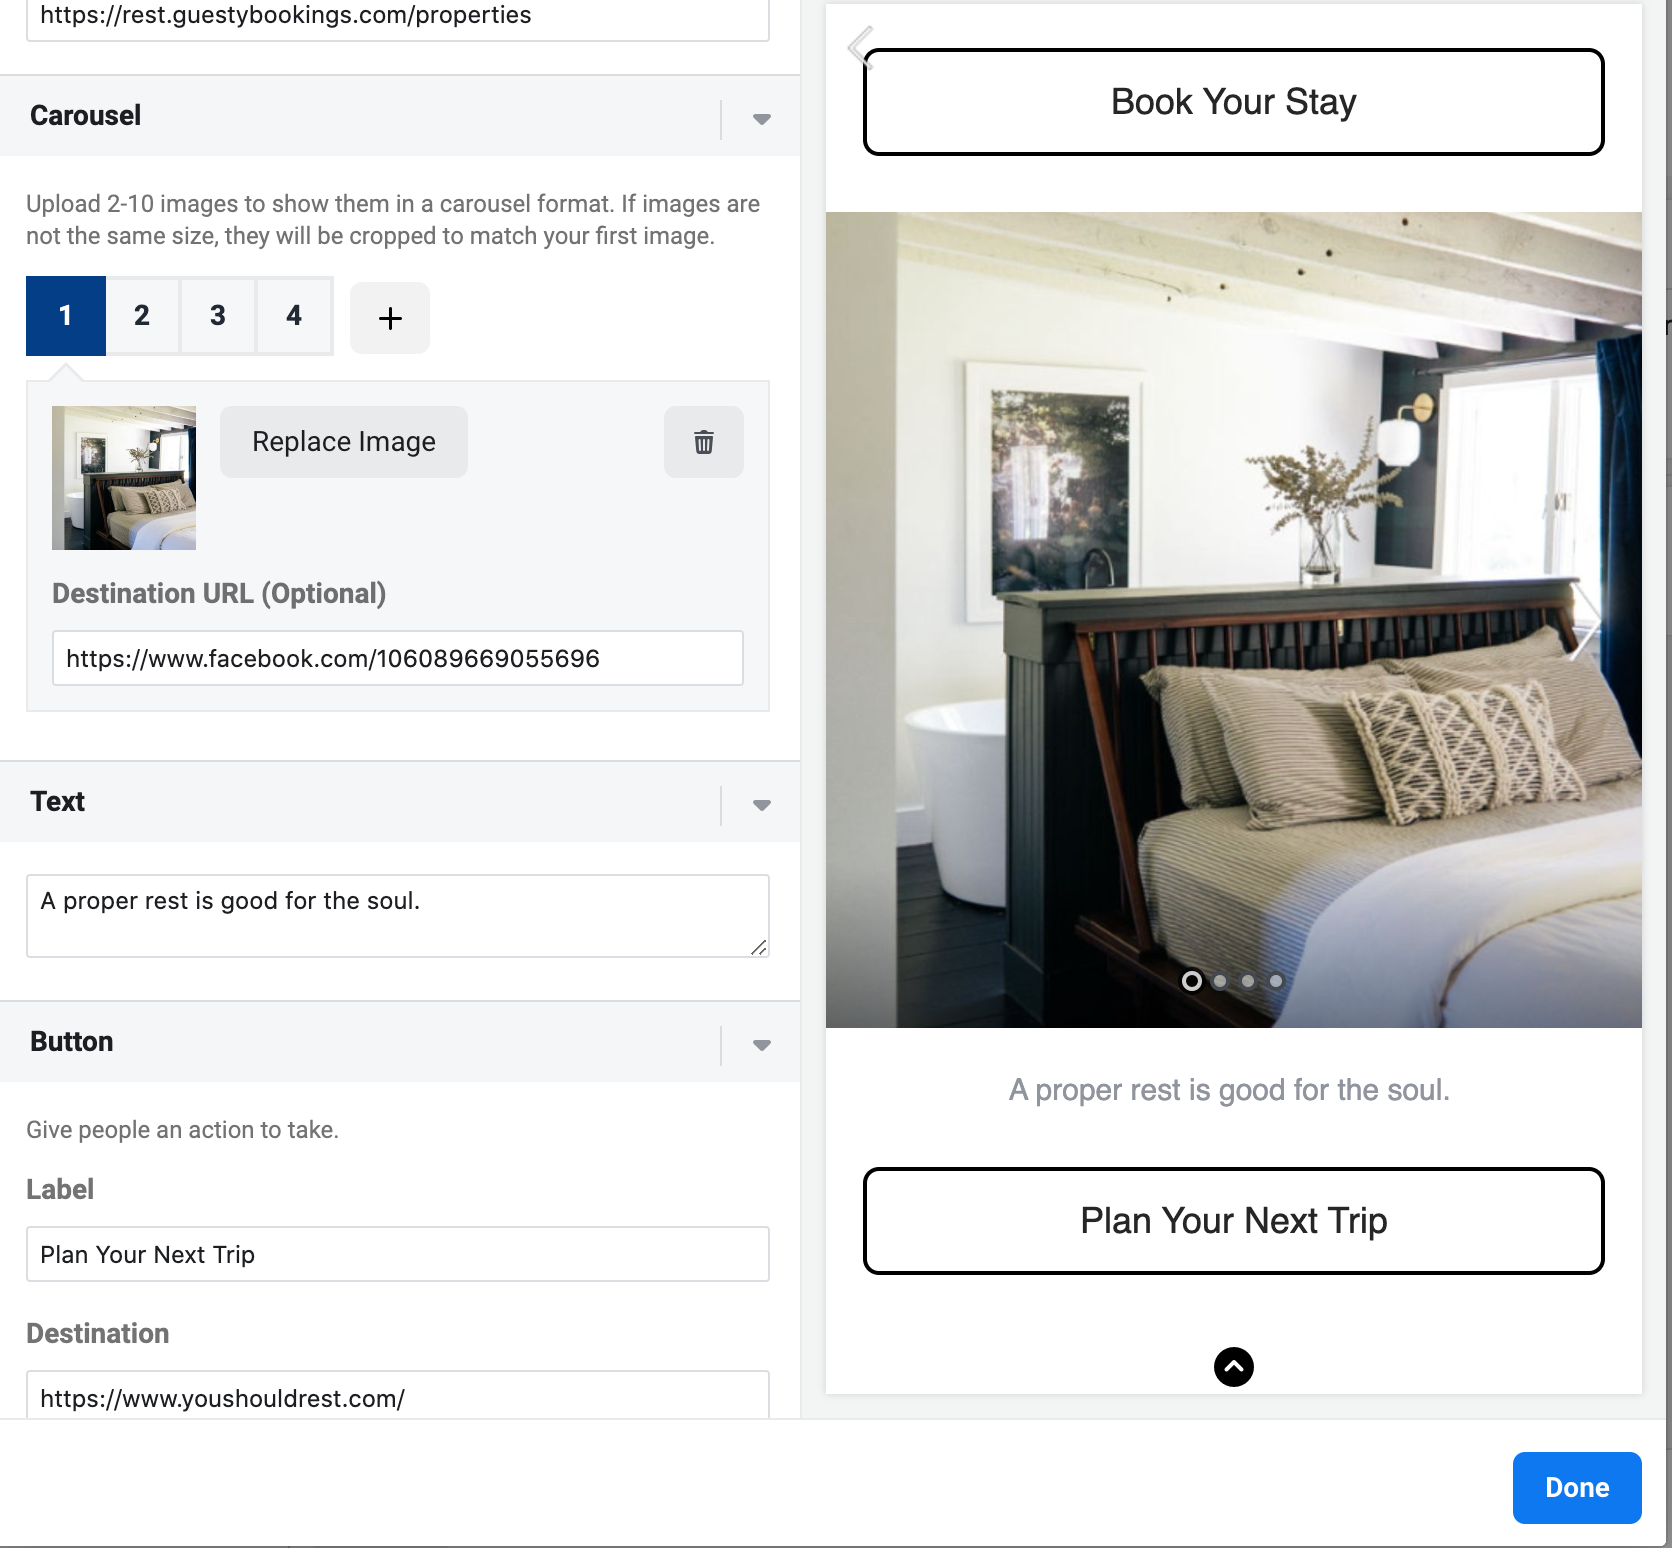
The last part of the ad is adding the destination URLs that match up with the buttons. I try to change the call-to-action on each button so it’s not redundant. You will see the label (aka the call-to-action) as “Plan Your Next Trip.”
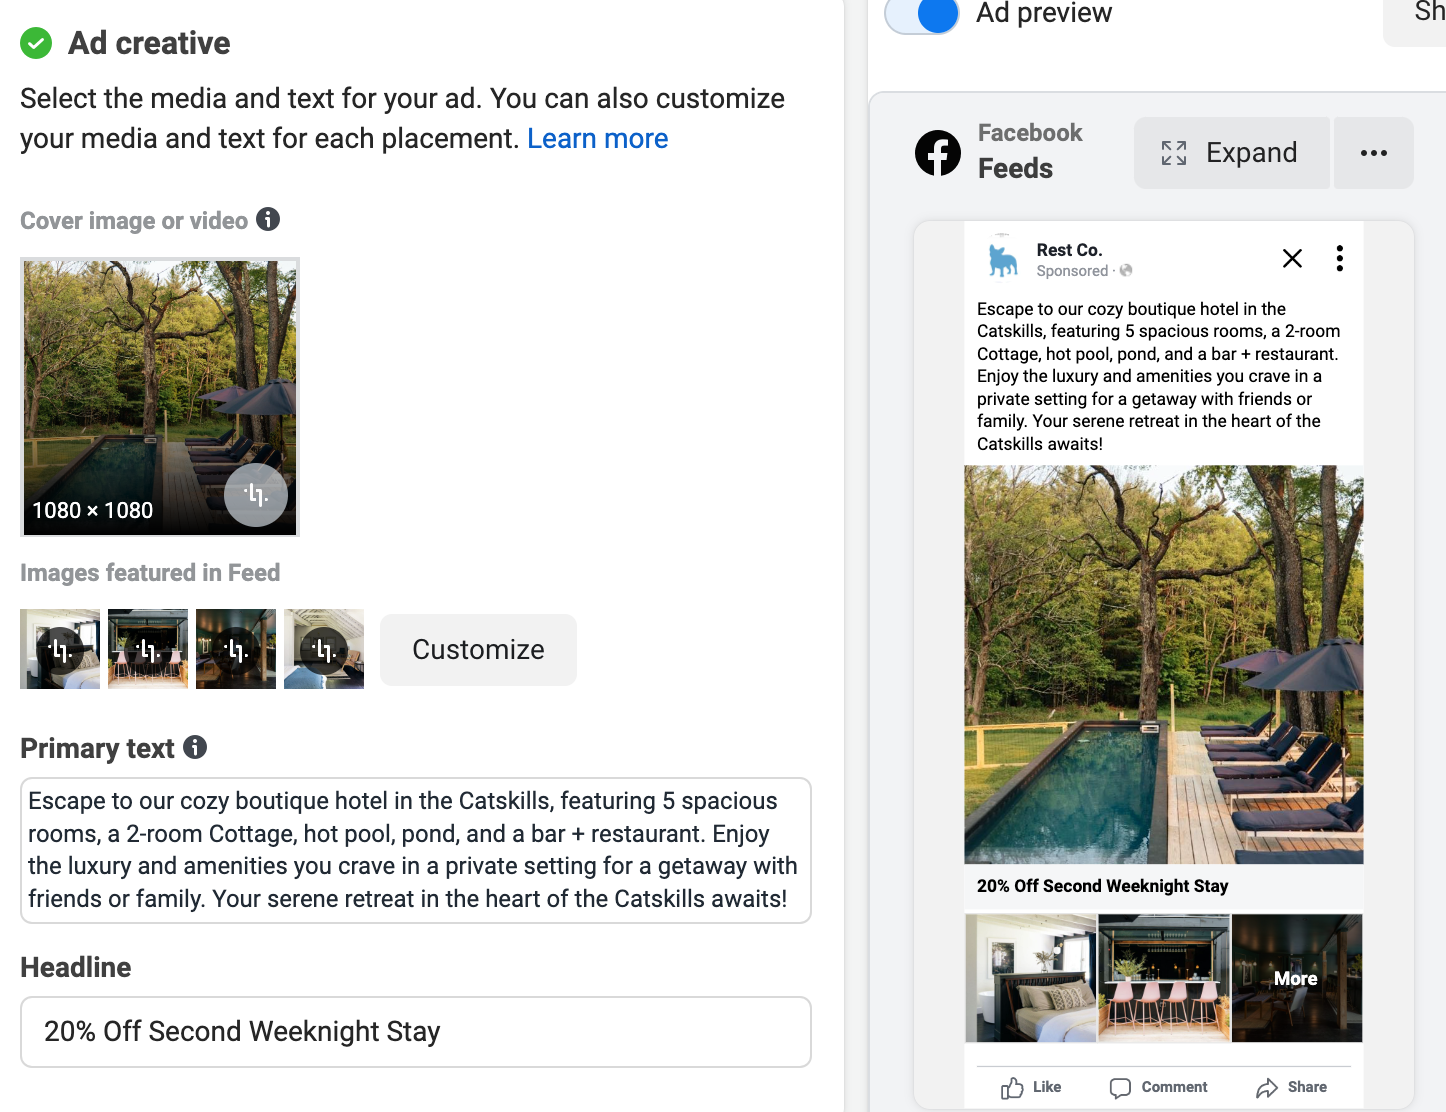
Once you have filled everything out, you will click “done” and you will be taken back to the ad where you can review all of the final details.
Tips
- Use your best photos
- Offer a discount or a promotion and put it in the headline
- Keep your ad copy hard hitting and concise – the goal is to get people to the site!
- Test out different audiences
- Test different photos and images
In Closing
You should have a better understanding of what a Mobile Instant Experience Ad is all about and how to easily set this up. If you have any questions or need social media support, you can contact our experts!
Below is a screen share to give you a better visual of what an Instant Mobile Experience Advertisement looks like!