
When it comes to advertising on Bing, there are a lot of positives. We’ve seen a lot of success among our clients when advertising on this channel. It’s true that Bing isn’t as popular as Google, however, average costs can be lower due to less popularity. Bing is an underutilized channel and one that can yield a high return. A huge pro of Bing advertising is how easy it is to import your Google ad campaigns directly into Bing.
Why is this important? Setting up ad campaigns can take a lot of time. Imagine spending a great deal of time getting your whole account setup in Google only to have to repeat the entire process in Bing. Bing makes it extremely easy to import your campaigns directly from Google and we’re going to walk you through the process step by step.
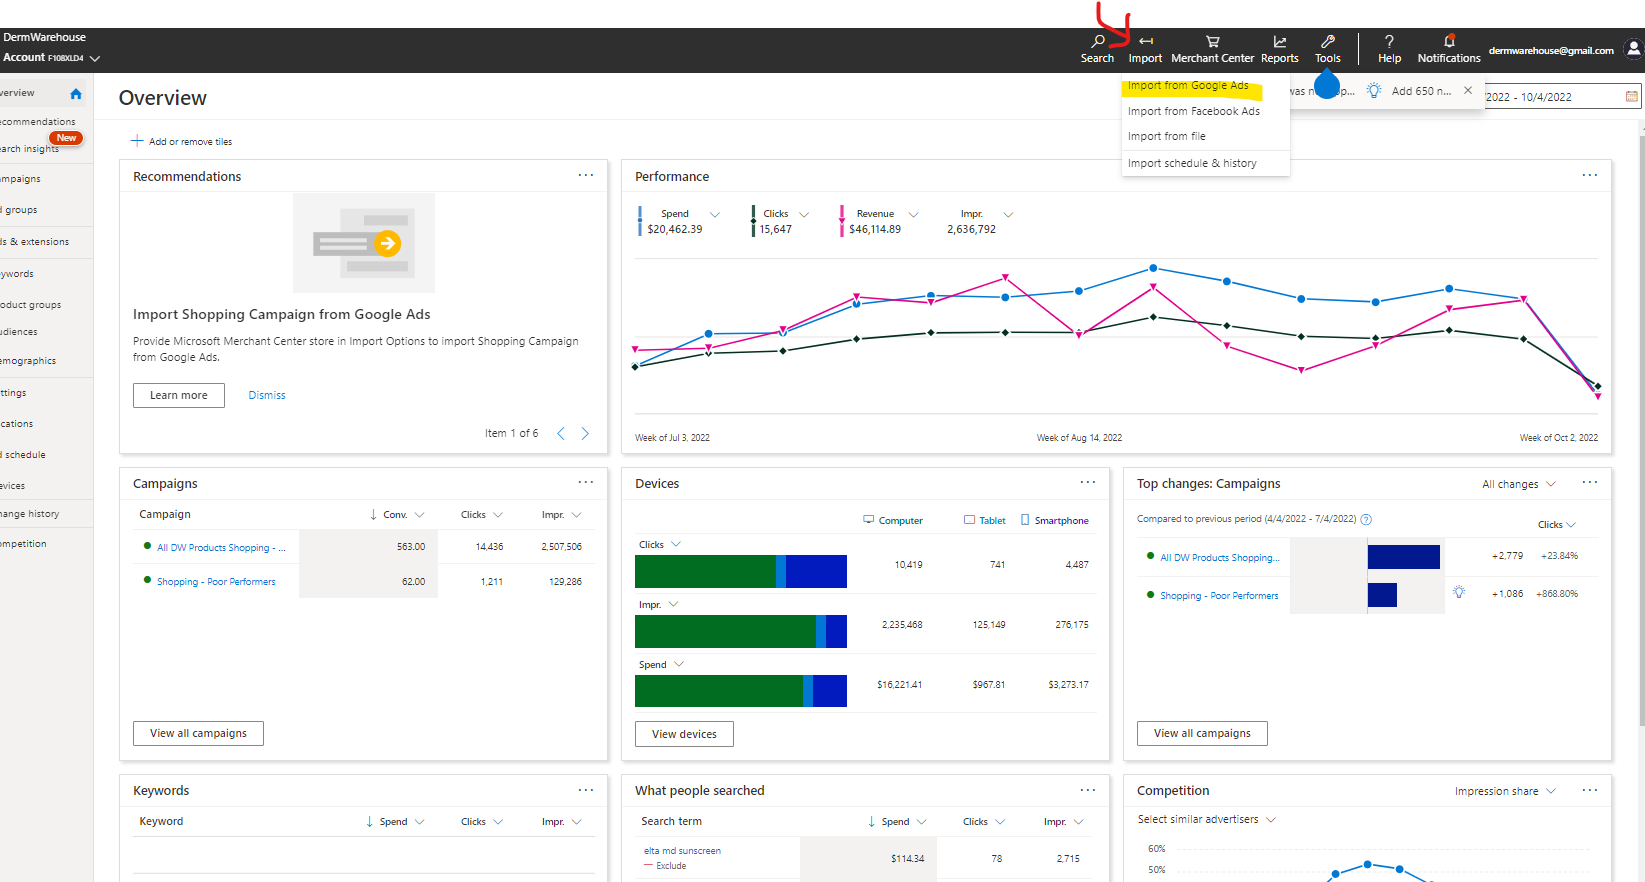
Step 1:
Login to your Bing ads account and navigate to the top right corner of the screen. Click on the button that says “Import” and then click “Import from Google Ads.”
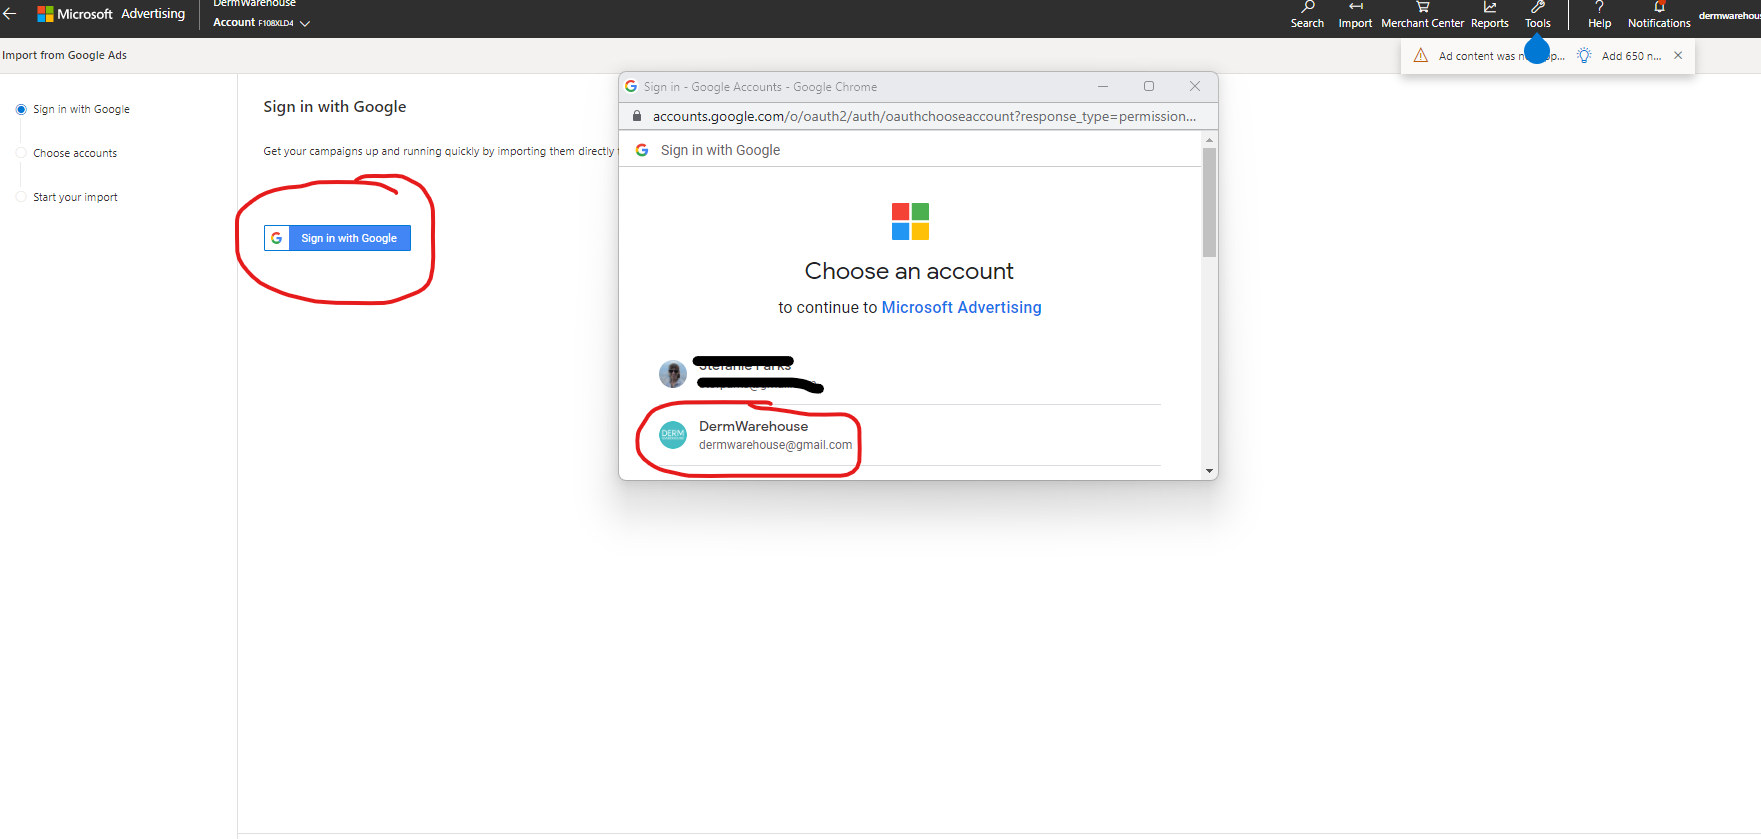
Step 2:
You’ll be directed to a screen that asks you to sign into Google ads. Follow the instructions here and sign in with Google. Make sure you have your Google ads login handy!
Step 3:
You’ll also need to sign into Merchant Center if you’re wanting to import any Google Shopping campaigns.
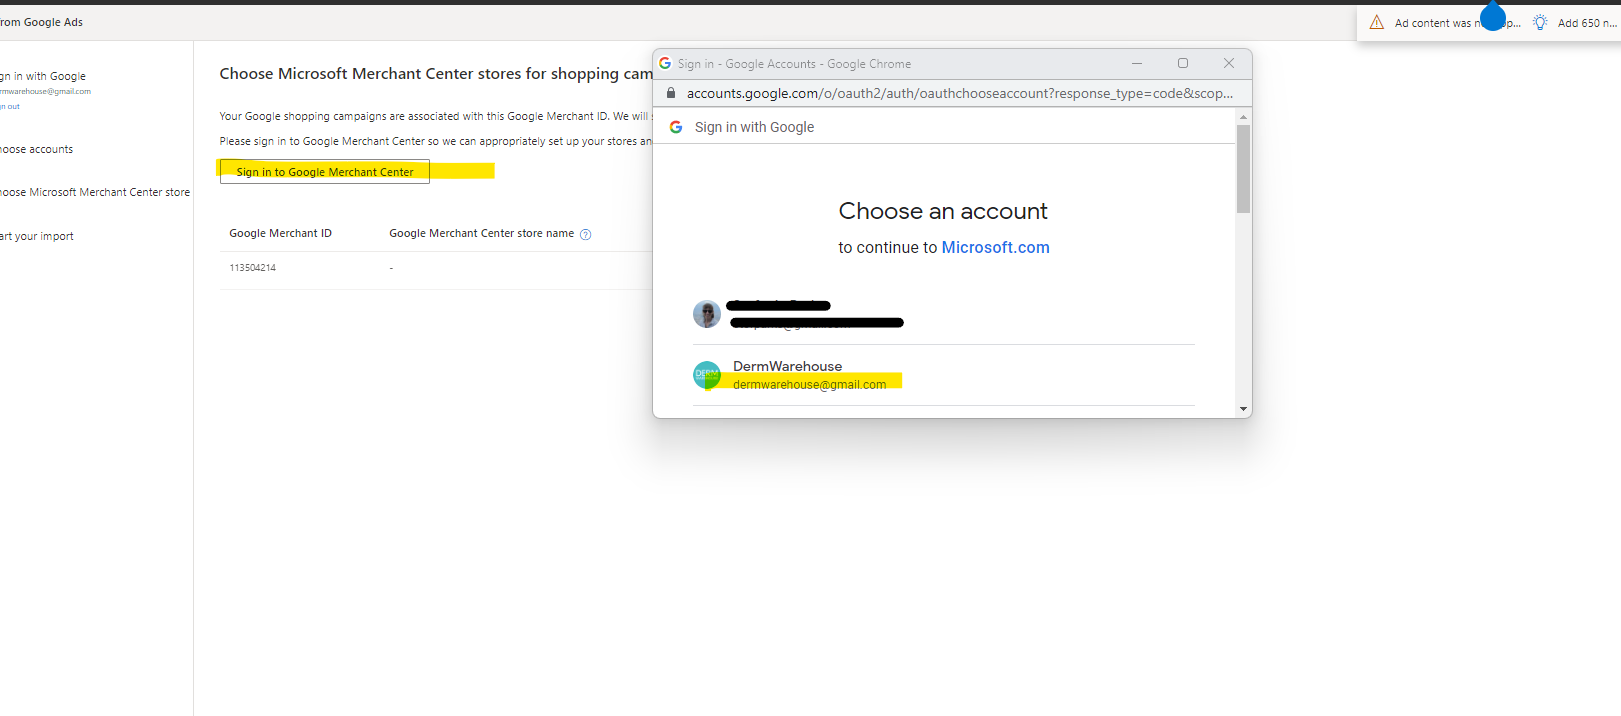
Learn More: What You Need to Know About Google Merchant Center
You’ll also need to confirm that Microsoft can access your data.
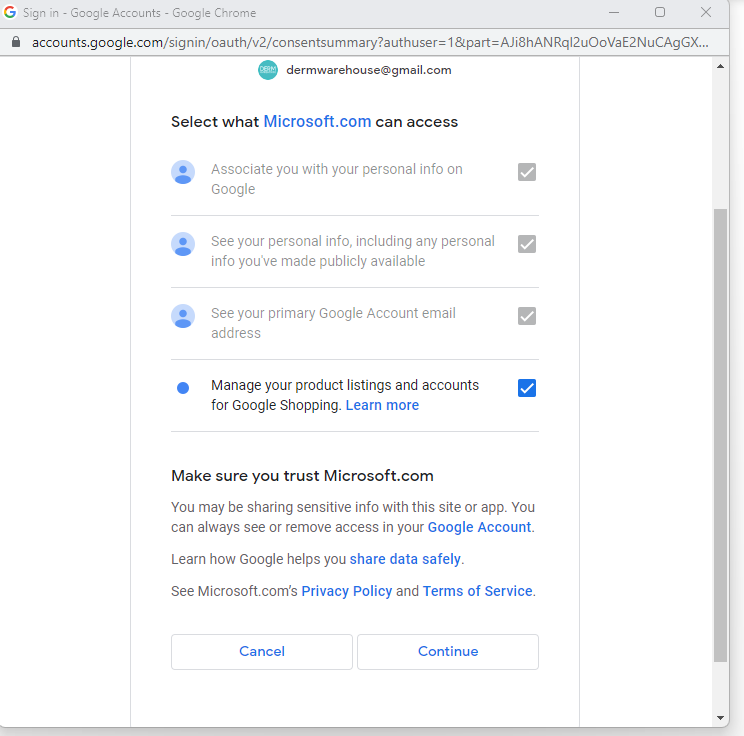
Press continue and then click “Next” at the bottom of the screen.

Learn More: What to Do With Poor Performing Products in Google Shopping
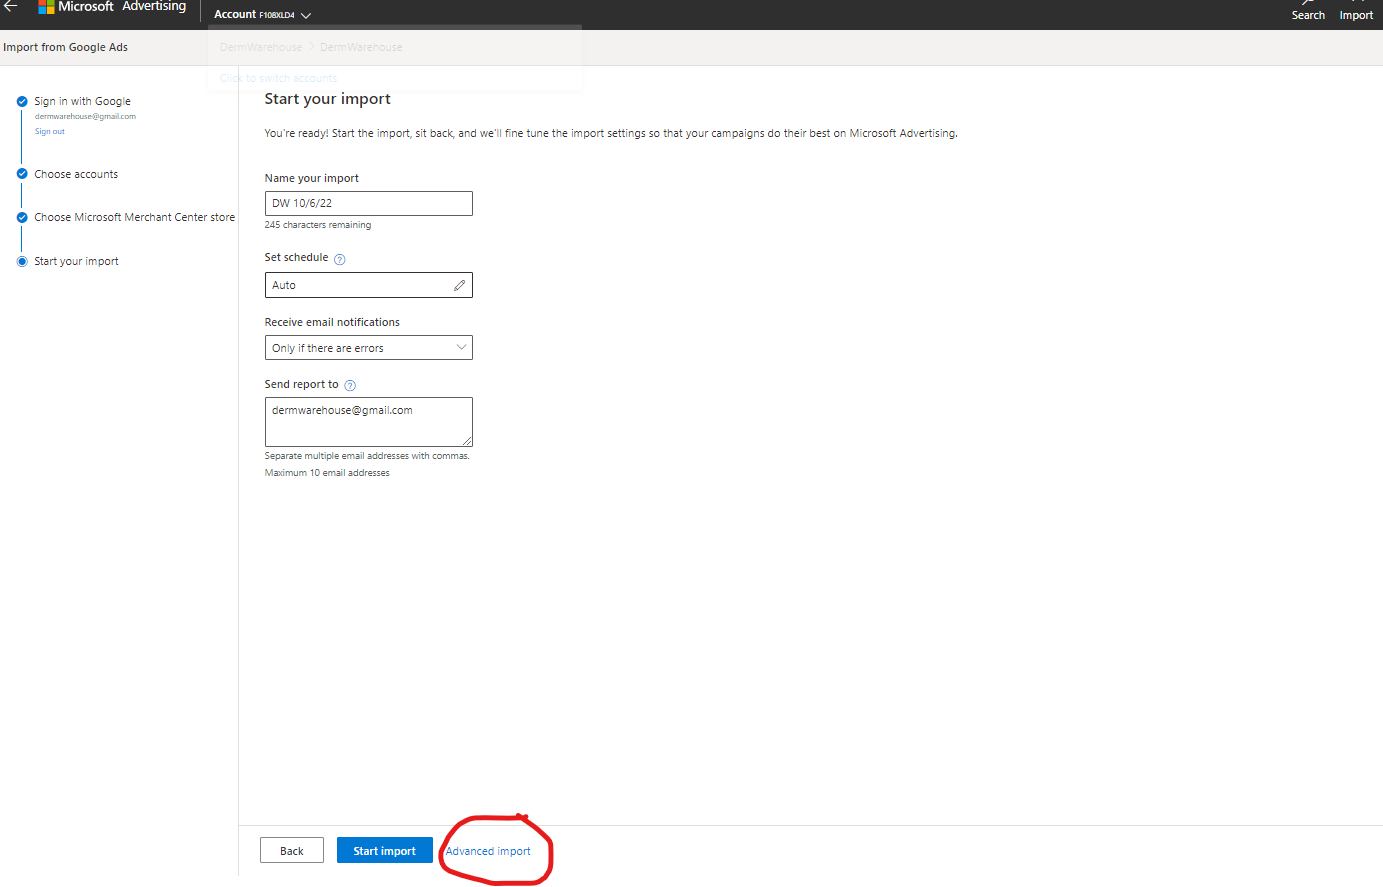
Step 4:
When you get to the next screen where you’re ready to start your import, you’ll want to click on “Advanced Import” at the bottom of the screen. This will give you the option to import everything within your Google ads account or only specific campaigns.
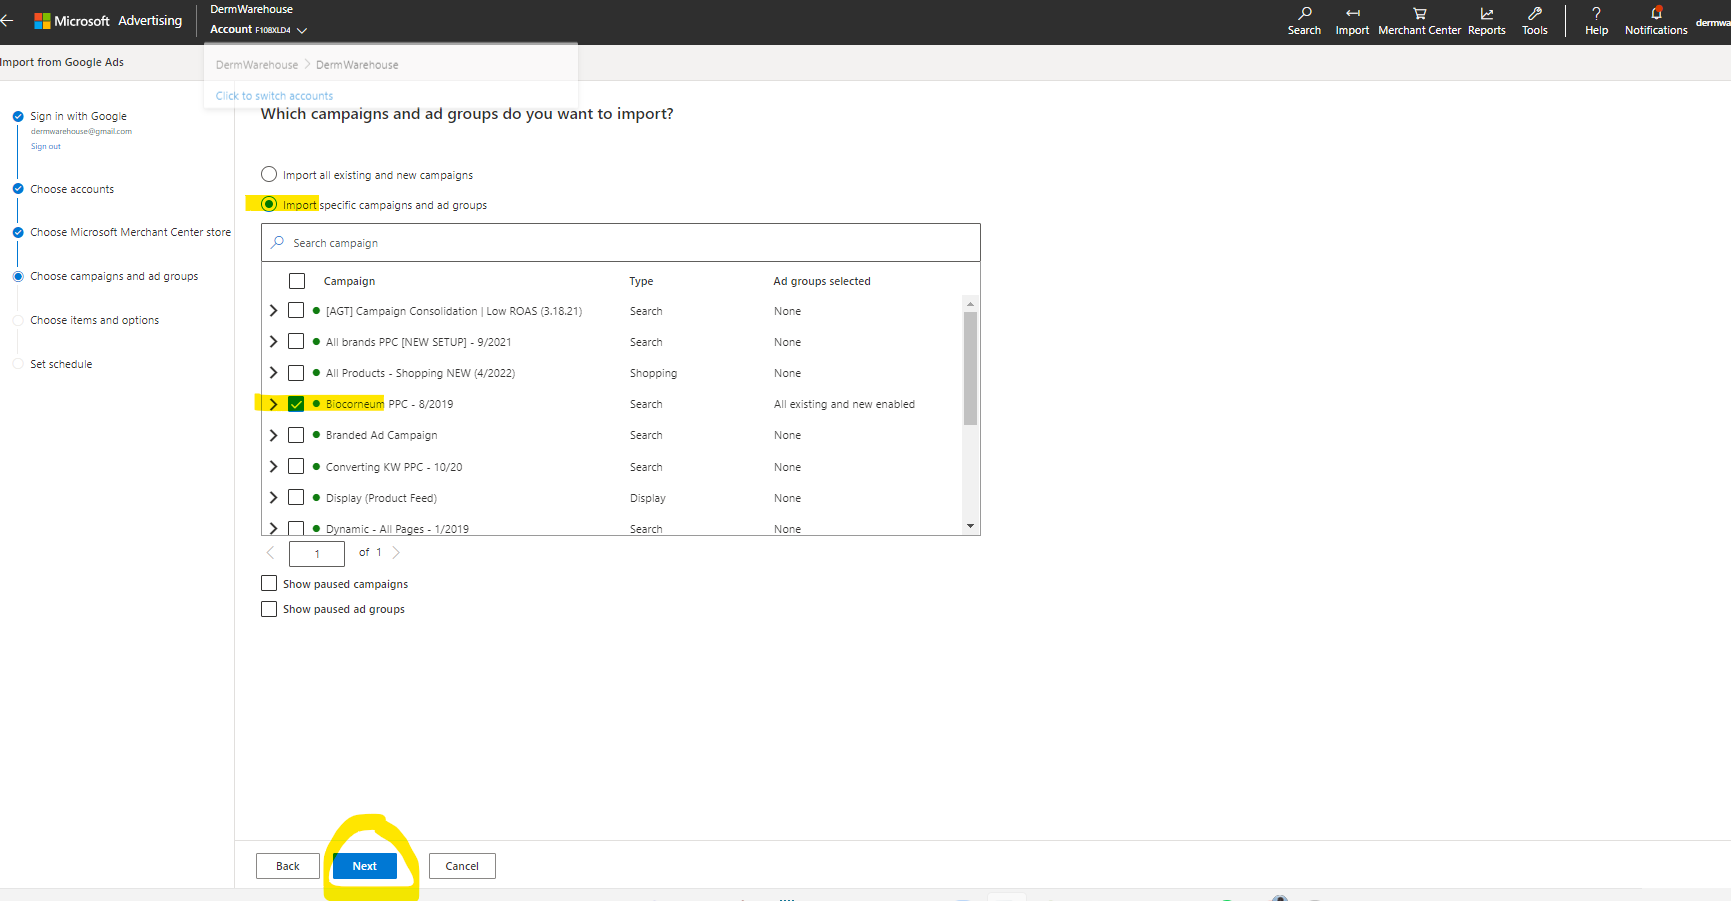
Step 5:
If you’re just getting started with Bing Ads, you may choose to import all of your campaigns from Google at this point. You can also choose to import only selected campaigns. This is the option we’ll go with for purposes of this example since we’ve already imported our campaigns into Bing!
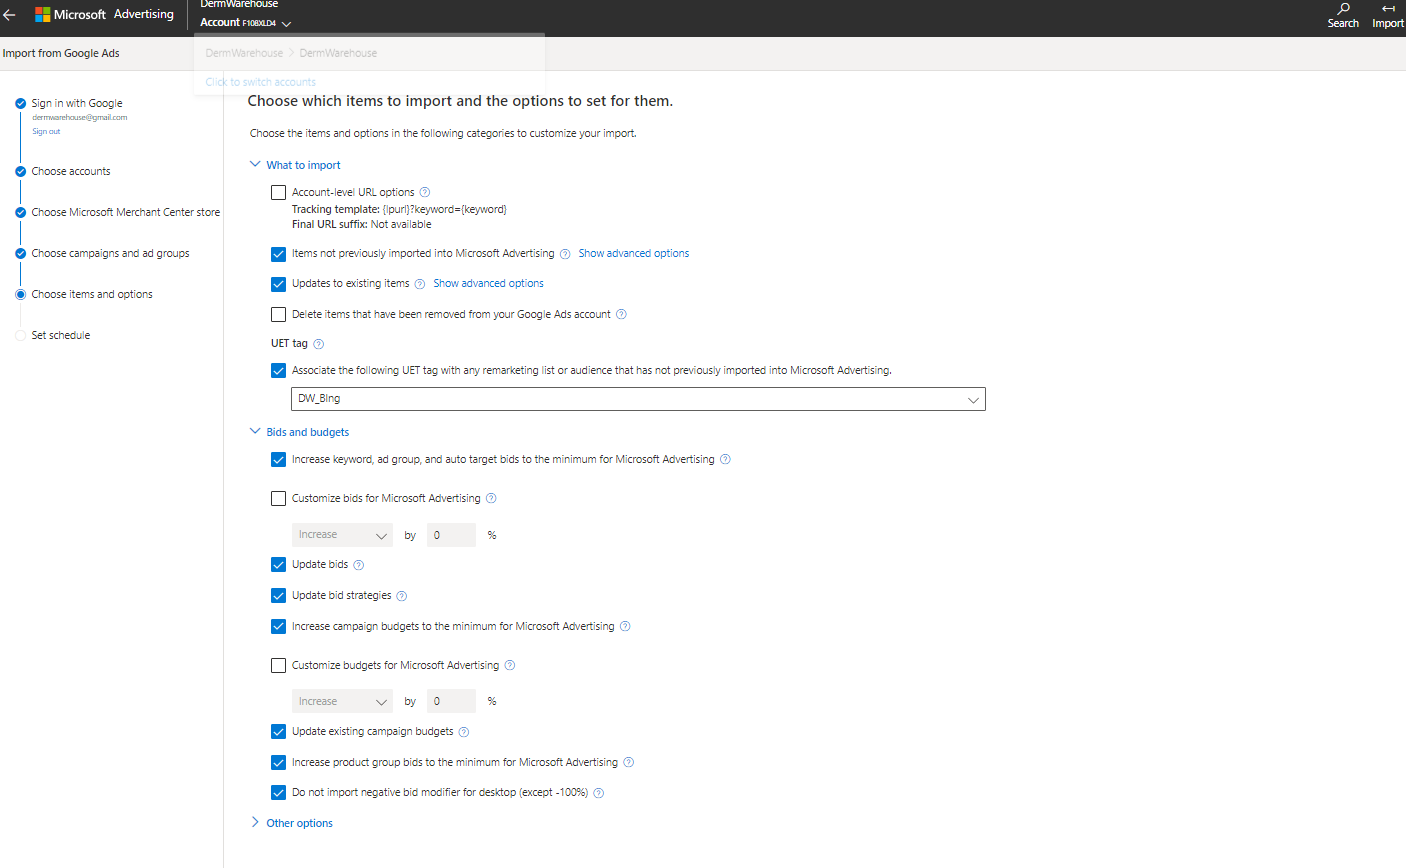
Step 6:
In step 6, you’ll choose your import settings. See below for the options that we typically select. This tells Bing to only import any changes or new campaigns. If there were any updates to bids, budgets, etc. in an already existing campaign, these changes would be reflected here.
This makes things really convenient because when you make changes to a campaign in Google, you can just import the changes into Bing. You can even set this up to be imported on a recurring basis to automate this process.
When you’re done making your selections, click “Next.”
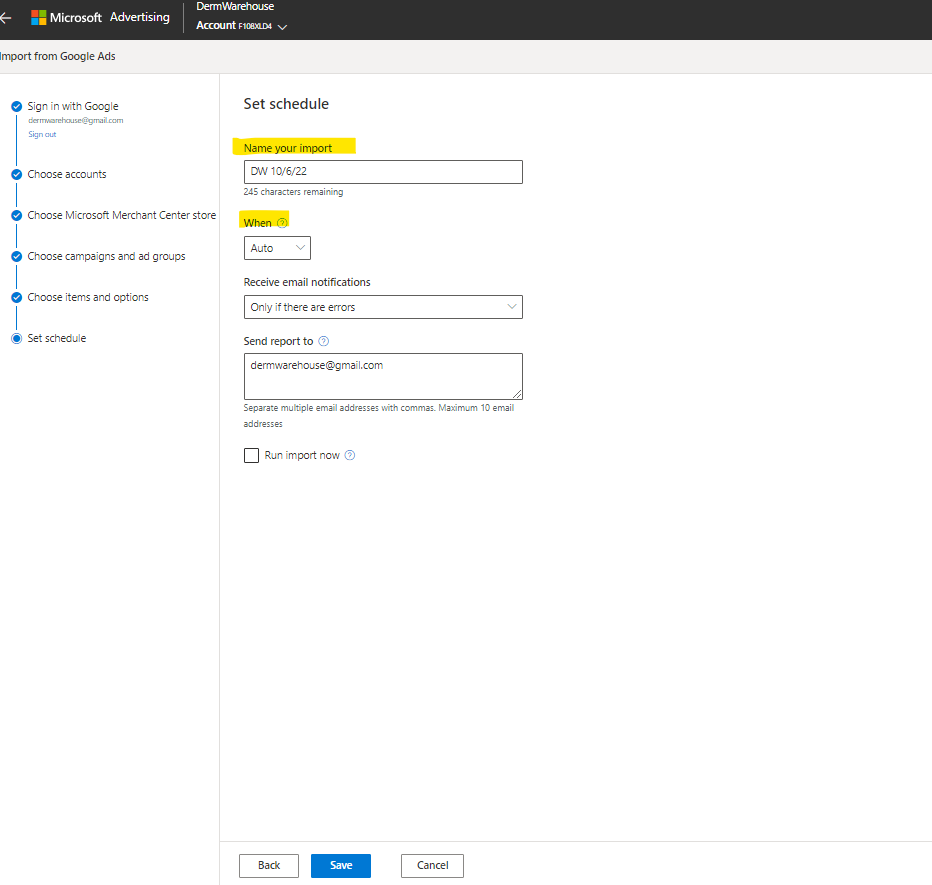
Step 7:
Name your import and select the frequency of your import. This is another convenient feature. If you’re constantly making changes to your campaigns, you can choose an import schedule. You can choose for imports to happen now, once, daily, weekly, or monthly. You can base your schedule on how often you make campaign changes, or you can choose to just update this once. Once again, this ensures that any changes you make in Google are reflected in Bing.
Once you’ve made your selections, click “save.”
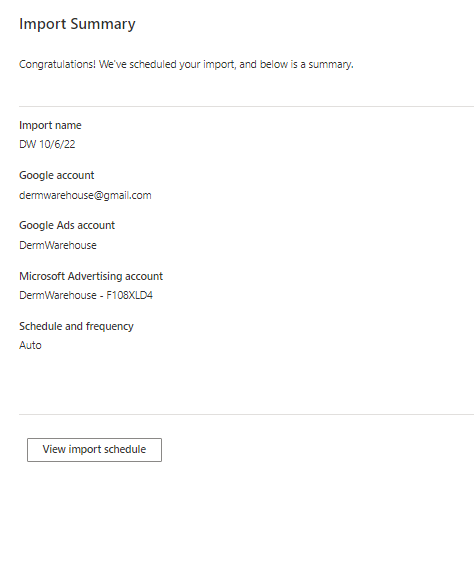
Step 8:
At the end of the process, you’ll get a confirmation that your campaigns were imported successful. Congratulations, you’re work here is done!
Need help getting set up with Bing Ads? Contact The Media Captain!