Overview
If you are running Google Ads, there’s a good chance that you’re going to need to update your payment information at one point or another. Learning how to create a new Payment Profile or updating your current payment information in Google Ads is an easy process. However, if your Payment Profile is not set up correctly you could run into issues when trying and will need Google support to complete the process. In this article, we will explain:
- Who is authorized to change payment information
- What is a Google Ads Payment Profile
- How to change your payment information
- How to complete a billing transfer in Google Ads
How to Change Your Google Ads Payment Information
Changing your payment information within your Google Ads Payment Profile is simple. Before we jump into the steps to change your payment information, it is important to understand what your Google Ads Payment Profile is and how it works.
According to Google Ads, your Payments Profile keeps details about the person or organization that is legally responsible for costs produced by a Google Ads account. Originally when you created your Google Ads account, you would have created a new Payment Profile with your billing information or used an existing Payment Profile that was already created. The Payment Profile contains information such as your contact details, payment methods, and settings. Each payment profile has a unique ID number associated with it, which is different from your Google Ads account number. This can be found in the Payment Settings within the Google Payments account section. It is important to note that only administrative users are authorized to make changes to the payment information within accounts. If you are an authorized payments user and need to make changes to your payment information, follow the steps below.
- Step 1: Sign into your Google Ads account.
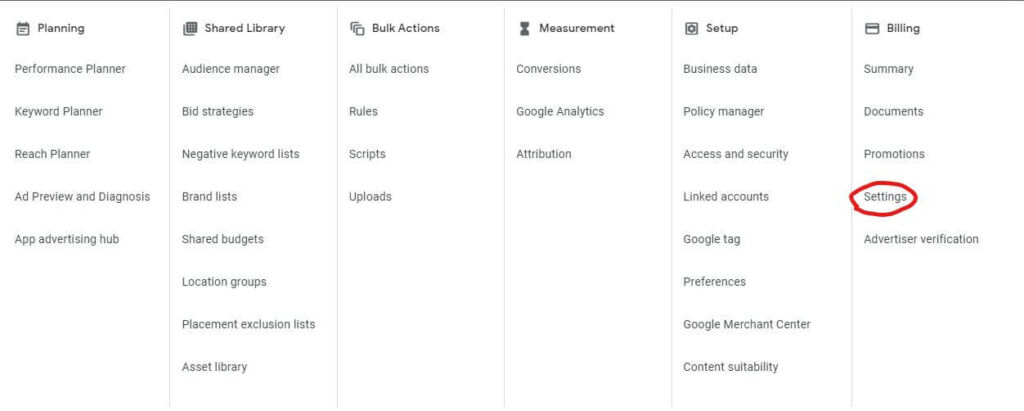
- Step 2: Click on Tools, and under the Billing section, select Settings.
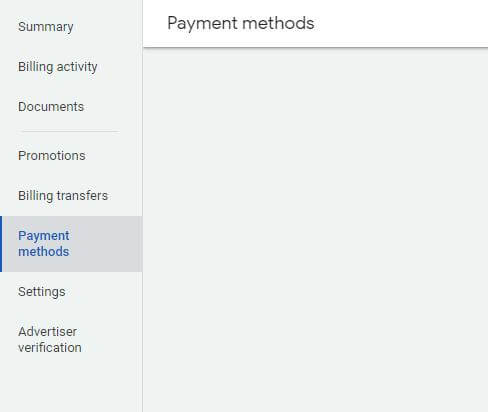
- Step 3: Scroll down to “Payment Methods.”
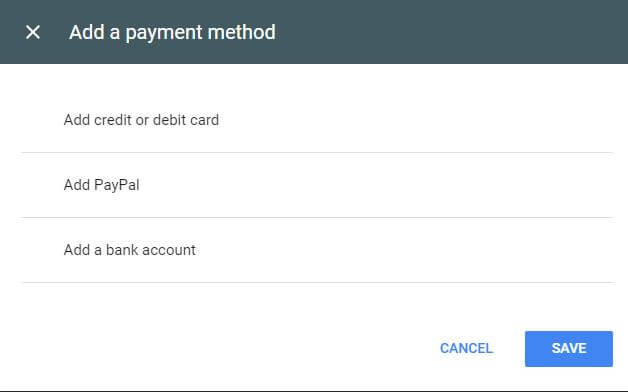
- Step 4: Add Payment Method and set it to “Primary.”
- Note: You must first add a payment method before you can remove your old payment method.
- Step 5: Remove any other payment methods you no longer want to use by clicking the remove button.
Voila, that’s all there is to it! Congratulations, you have successfully updated your payment method within Google Ads.
Switching to a New payment Profile in Google Ads
Examples of Why You Would Need a New Payment Profile
There are some circumstances in which you may need to switch your Payment Profile. I recently had two instances where I had to update the payment profile for two different clients. In one of the cases, the previous agency that managed the Google Ads account had their payment profile connected with the client’s account and we had to create a new payment profile in order for the client to use their own credit card information. In the second case, the client mistakenly used their own personal information when they created their payment profile and we needed to create a new profile in the business’s name. In both of these cases, we needed to perform a billing transfer, in which all the accounts under the previous payments profile needed to be moved to a new paying manager account.
Steps to Create a New Payment Profile
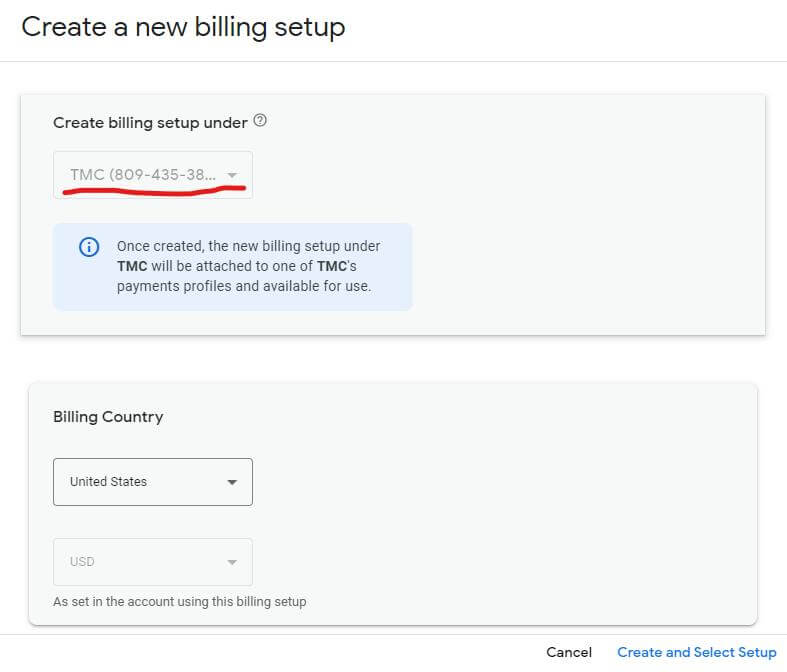
Creating a new Google Ads profile is not as easy as you think. If your payment profile is already created and linked to your manager account, you simply need to follow the steps provided in this Google AdWords video to connect it. However, if you follow the steps in this video and get to the part where you need to create a new billing setup and the option is grayed out for you, you will need to contact Google Support for assistance.
In the example below, we didn’t want to use the default billing setup, and since it was grayed out, we needed Google’s assistance to complete the process.
- Contact Google Support when you need to create a new Payment Profile and link it to your account.
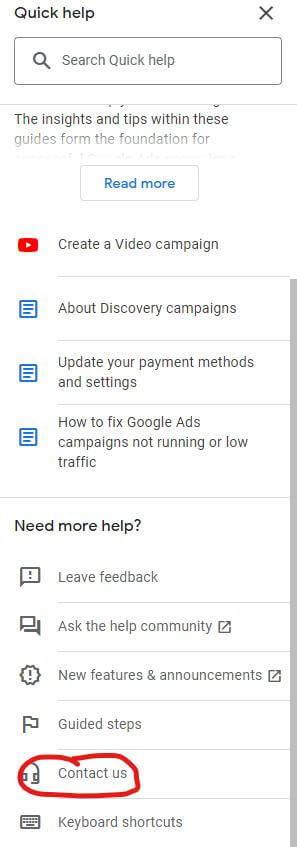
- In the upper right-hand corner of the screen, select the Help button and scroll down until you find the “Contact Us” button.
- You should see a screen that says, “Tell us what you need help with:”
- Type, “create payment profile.”
- You will then be provided with a list of topics based on your search. Select “Change billing,” then scroll to the bottom and click “Next step.”
- You will then be brought to a “Contact Us” screen where you will select your Google Ads account and options to contact Google.
- In my experience, you have to select the “Email” option when creating a new Payment Profile.
- From here, you’ll be asked to select one of three options.
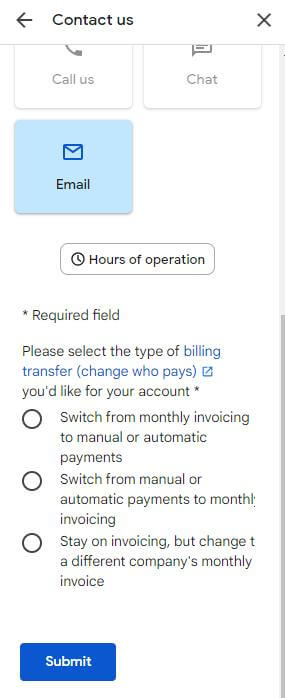
- From the descriptions of the options above, it wasn’t clear to me which option I needed to select. I ended up selecting, “Stay on invoicing, but change to a different company’s monthly invoice,” and hit the “Submit” button.
- Now, you wait for Google to reach out to you via email. It can take up to a week or longer to get a response from Google.
- When you receive an email from [email protected], it will contain a form that you need to complete and email back to them. Below is an example of the form that will need to be completed by an admin on the existing Payment Profile.
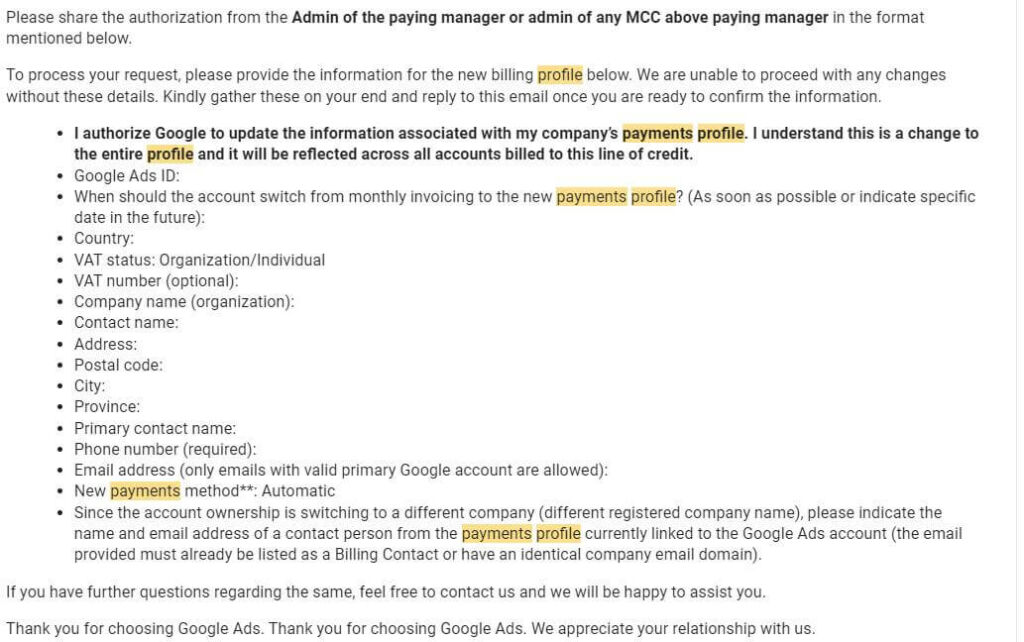
- Once this information is completed and sent back to Google, you will receive a confirmation email from Google that it was received.
- Google will reach out to you to verify account ownership. The email will look similar to the example below.
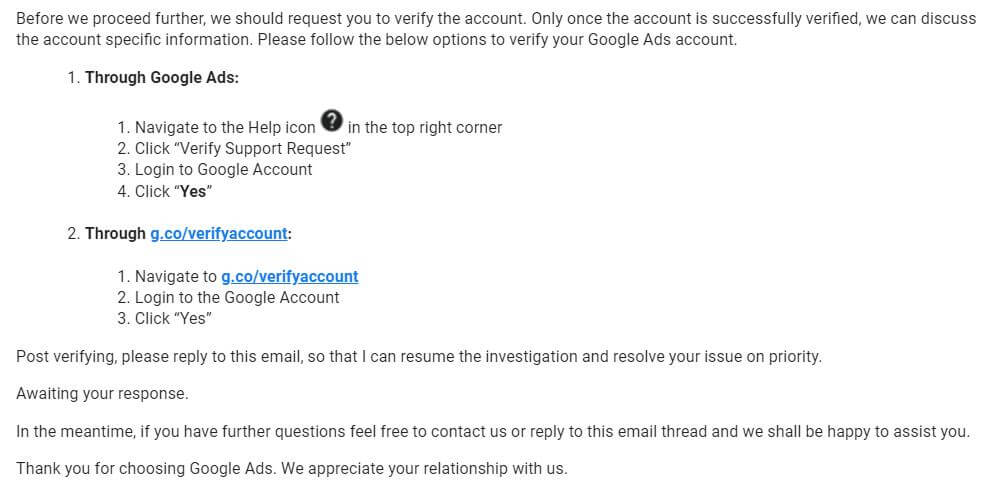
- Once you complete the verification, Google will then process the request for payment transfer.
Helpful Tip
To expedite the process of updating your Payment Profile, I recommend completing the Google verification process first. Not only will this verification process allow you to complete the Payment Profile change more quickly, but it will also allow you to use your business name and logo within your ads. If you are unfamiliar with this process or need help, please watch our short video tutorial on how to complete this.
Google Ads Payment Key Takeaways
- It’s important to ensure your Payment Profile is set up correctly from the beginning.
- Updating your payment information will be a simple process if your Payment Profile is listed in the business’s name and you are listed as an authorized administrative user on the account.
- If you need to reach out to Google Support to change the Payment Profile, put on your patience hat and follow the steps listed in this article.
- To expedite the Payment Transfer process, consider completing the Google verification process first.